This post may contain affiliate links. If you purchase through these links, we may earn a commission at no extra cost to you.
Ever crave something crispy and satisfying after a long day, but dread the thought of greasy takeout? You want to feed yourself or your family something wholesome, yet time feels perpetually short.
What if you could create a restaurant-quality bite in your own kitchen with minimal effort? Your air fryer makes it possible, delivering golden, crunchy pieces with a moist, flaky center in under ten minutes.
This clever way of cooking turns fresh salmon into a versatile star. It’s perfect for a speedy weeknight dinner, a hit with kids, or a protein-packed topping for your lunch bowl.
Rich in omega-3s and lean protein, this fish is a nutritional powerhouse. The process is straightforward, requiring only a handful of ingredients for one fantastic recipe.
This guide will walk you through every step, from selecting the best cut to pairing it with zesty dips. Let’s unlock the secret to a quick, nutritious, and delicious meal that cooks in minutes and will become a favorite in your rotation of air fryer recipes.
Table of Contents
Introduction: Your New Favorite Way to Eat Salmon
The secret to loving seafood often lies in its preparation, turning potential hurdles into delicious advantages.
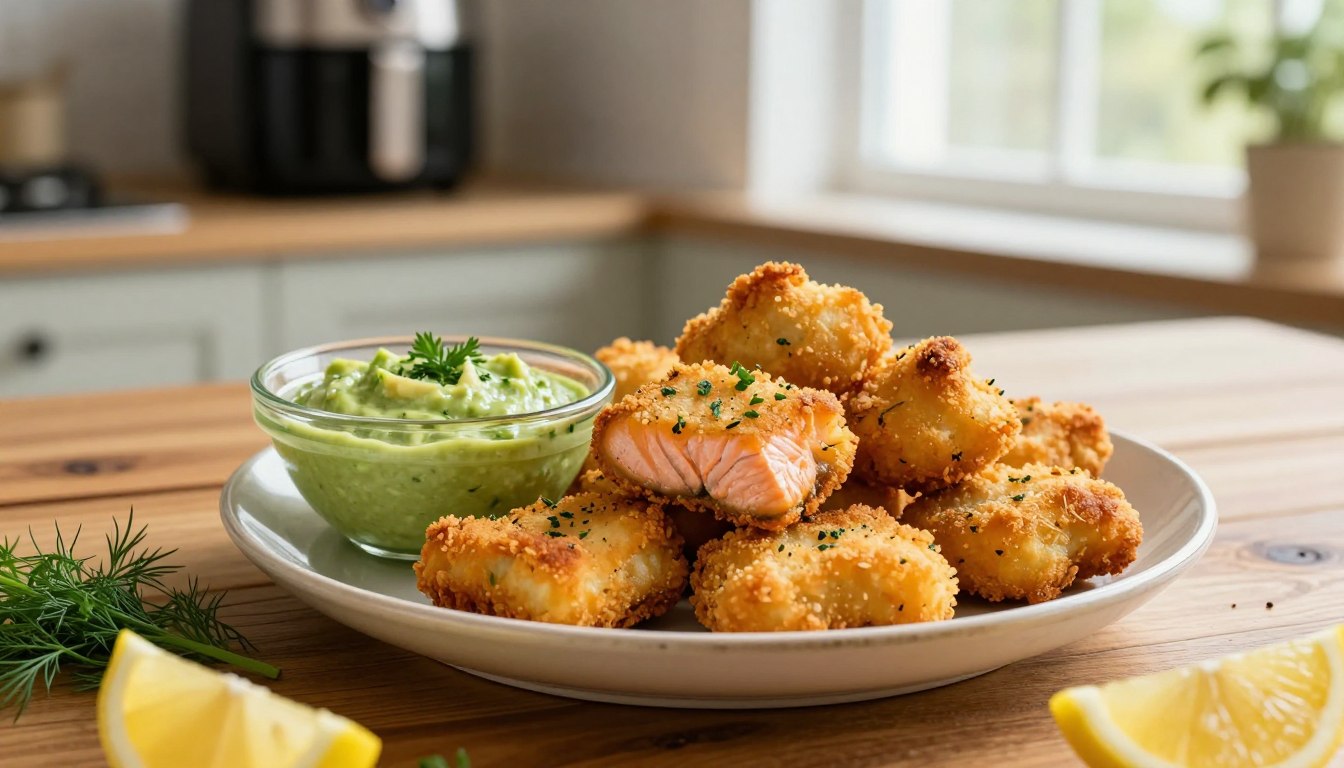
This approach transforms a premium fillet into craveable, bite-sized pieces. Each morsel offers a perfect balance of textures.
You get a golden, crunchy exterior that gives way to a tender, flaky center. It’s a sensory experience that makes every bite rewarding.
Common concerns about a strong taste or tricky cooking methods simply fade away. The high-heat method locks in moisture while creating that desirable crispness.
It’s a fantastic solution for incorporating lean protein into varied diets. Even the pickiest eaters are often delighted by these handheld delights.
From prep to your plate, the entire process takes about fifteen minutes. This makes it an ideal solution for hectic evenings when you need a fast, wholesome dinner.
The versatility of these little pieces is a major win. Toss them into a grain bowl for a hearty lunch, scatter them over a fresh salad, or serve them as a crowd-pleasing appetizer.
You are not just making a quick meal. You’re enjoying a food rich in beneficial omega-3 fatty acids and high-quality protein that supports heart health and keeps you full.
Feeling confident about this recipe is easy, no matter your skill level in the kitchen. We’ll guide you through selecting the best ingredients and share pro tips for flawless results every time.
Get ready to make this cooking method a regular part of your weekly routine. It truly changes the game for enjoying nutritious and delicious food on a busy schedule.
Why You’ll Love This Air Fryer Recipe
Imagine achieving a crispy, golden finish without the mess and calories of deep frying. This cooking method delivers on multiple fronts, making it a standout choice for any home cook.
You get a fantastic combination of speed, better nutrition, and broad appeal. Let’s explore the top reasons this dish will become a go-to in your kitchen.
Quick and Convenient Weeknight Dinner
After a busy day, you need a fast and reliable meal. This recipe answers the call perfectly.
From start to finish, your wholesome dinner is ready in about fifteen minutes. Minimal prep and easy cleanup mean more time for you.
It’s a simple solution that feels special. You can have a satisfying, restaurant-style dish on the table with almost no effort.
A Healthier, Crispy Alternative to Frying
Craving that satisfying crunch? Your appliance uses rapid hot air to create a perfectly textured exterior.
You use little to no added oil compared to traditional methods. This means you enjoy all the crispiness with far fewer calories.
The result is a lighter, guilt-free bite that doesn’t sacrifice taste. It’s a smart way to enjoy your favorite textures while supporting your wellness goals.
Best Amazon Picks:
Kid-Friendly and Perfect for Picky Eaters
The fun, bite-sized shape is a major win for families. These little pieces are easy for small hands to hold and dip.
For those new to seafood, a mild breading or a simple marinade can make the flavor more familiar and inviting. It’s a great introductory experience.
Get kids involved in the kitchen. Let them coat the pieces or pick a favorite sauce for dipping. This engagement often leads to a more adventurous appetite.
Serve these salmon bites with sides everyone loves. Think sweet potato fries, steamed broccoli, or a simple “build-your-own” bowl station.
This approach helps your family enjoy more fish in a totally approachable way. It turns a nutritious ingredient into a requested meal.
Gathering Your Ingredients & Equipment
The foundation of any fantastic recipe is a well-organized mise en place—your ingredients and equipment laid out and ready.
This simple step transforms cooking from a frantic search into a calm, efficient process. You will move seamlessly from prep to plate.
Your Simple Shopping List
You need just a handful of fresh, high-quality items. This keeps the focus on clean, vibrant flavors.
- Your Main Protein: One pound of fresh or properly thawed fillet.
- For a Crispy Coating (Optional): All-purpose flour, a beaten egg, and seasoned breadcrumbs or panko.
- For a Simple Marinade (Optional): Olive oil, lemon juice, garlic, and your favorite herbs like dill or paprika.
- The Finishing Touch: Salt, black pepper, and a light cooking oil spray.
Essential Kitchen Tools for Success
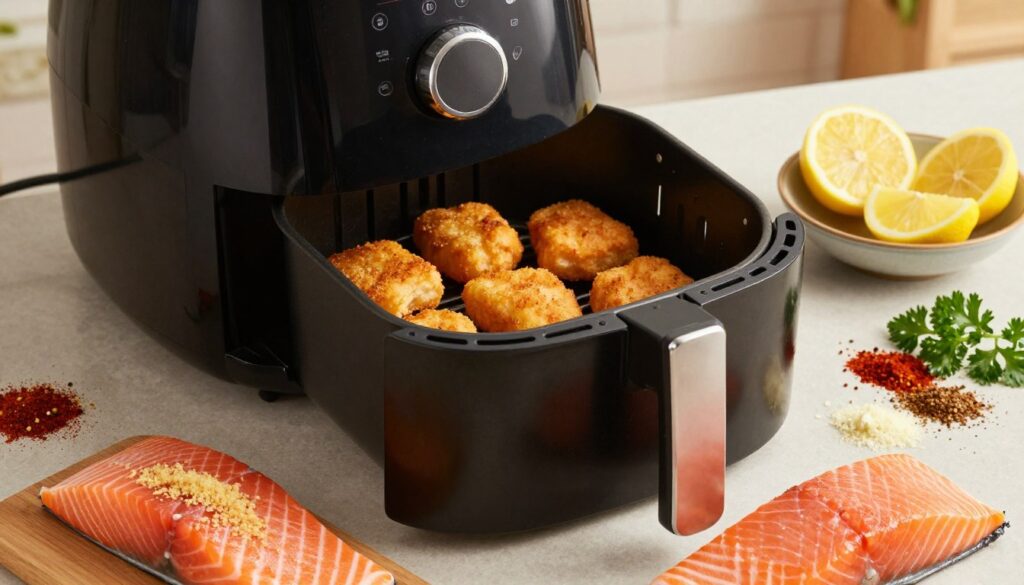
Having the right tools on hand makes everything easier. Your most crucial piece of equipment is, of course, the cooking appliance itself.
Whether you have a basket-style or oven-style model, preheating it is recommended for the best crispness. A hot start is key.
Start your prep with a sharp chef’s knife and a sturdy cutting board. You will use these to remove any skin and cut the fillet into even, one-inch cubes.
Pat these cubes completely dry with paper towels. This step is non-negotiable for achieving a golden exterior.
For breading, set up three shallow dishes. Use them for your flour, egg wash, and crumbs in that order.
For marinating, a medium mixing bowl works perfectly. A small brush can be handy for applying any leftover glaze.
When it’s time to cook, lightly coat your air fryer basket with non-stick spray. This prevents sticking and promotes an even, crispy finish.
Use tongs to gently place salmon pieces in a single layer. Never overcrowd the basket; cooking in a single layer ensures proper air circulation.
A kitchen thermometer is useful to check for doneness. The safe internal temperature is 145°F.
For super easy cleanup, consider using perforated parchment liners designed for your air fryer basket. They catch crumbs while letting hot air flow.
How to Choose the Perfect Salmon
The quality of your final bite hinges on the initial decisions you make before cooking. Picking the right foundation ensures your dish turns out flavorful and has the ideal texture.
Your choice between fresh or frozen, and whether to keep the skin on, directly impacts the cooking process and your eating experience. Let’s break down these simple but crucial selections.
Fresh vs. Frozen: What’s Best?
You might wonder which option yields better results. Both have their merits, and neither is a wrong choice.
Fresh fillets are fantastic if you plan to cook them the same day. Look for flesh that is bright, firm to the touch, and has a clean, ocean-like scent.
Frozen fish is often flash-frozen at peak freshness right after catching. This locks in nutrients and flavor. It’s a convenient and reliable staple to keep on hand.
If using frozen, always thaw it completely in the refrigerator overnight. Pat it very dry before you start prepping. This step is key for any coating to stick properly.
Skin-On or Skin-Off? A Simple Guide
For this specific recipe, skin-off fillets are the superior choice. When cut into small pieces, the skin can become chewy. It also doesn’t crisp well in the hot air of your cooking appliance.
Removing it ensures even cooking and allows any breading to adhere perfectly. The good news is that skinless options are widely available at most grocery stores, saving you valuable prep time.
If your filet comes with the skin on, don’t worry. Removing it is a simple, quick task. Here’s how to do it easily:
- Place the piece skin-side down on a cutting board.
- Using a sharp knife, slide the blade at an angle between the flesh and the skin.
- Apply gentle pressure and use a sawing motion to separate them. Alternatively, you can grip the end of the skin firmly and pull it back away from the flesh.
One final check is for pin bones. Run your fingers along the center of the filet. If you feel any small, thin bones, use clean tweezers or pliers to pull them straight out.
This ensures every cube is a pleasure to eat, with no unexpected textures. Taking these few moments during prep guarantees a fantastic result.
If you enjoy simple homemade comfort meals like this Air Fryer Salmon Nuggets, you might also love these easy recipes:
- Maple Salmon
- Lemon Rosemary Salmon
- Chef John’s Salmon
- Grilled Cod with Spinach and Tomatoes
- Baked Fish in Foil
Step-by-Step: Prepping Your Salmon Nuggets
Your prep work sets the stage for everything that follows, determining texture, flavor, and cooking consistency.
You have two fantastic paths to choose from for this recipe. The first gives you a classic, crunchy coating. The second infuses deep, savory flavor directly into the fish.
Both methods share two non-negotiable starting steps. Mastering these ensures perfect results every single time.
| Method | Best For | Key Texture | Prep Time | Flavor Profile |
|---|---|---|---|---|
| The Crispy Breaded Bite | Classic crunch lovers, kid-friendly meals | Golden, crunchy exterior with tender inside | ~10 minutes | Mild, seasoned by the coating and dip |
| The Flavor-Packed Marinated Bite | Big, bold flavor, low-carb or gluten-free diets | Juicy, caramelized exterior | ~15 minutes (includes marinating time) | Rich, infused with herbs and spices |
Method 1: The Crispy Breaded Nugget
This approach delivers that satisfying, restaurant-style crunch. It uses a simple three-step breading station.
Set up three shallow dishes. Fill one with all-purpose flour, one with a beaten egg, and one with your chosen crumbs.
Seasoned panko creates an extra-crispy shell. Regular breadcrumbs offer a more uniform, golden finish.
Take your dry, cubed fillet. Dredge each piece first in flour, then dip in egg, and finally coat thoroughly in crumbs.
Press gently to help the coating adhere. Place the breaded bites on a plate until you’re ready to cook.
Method 2: The Flavor-Packed Marinated Bite
For a gluten-free option or deeper taste, marinating is your best bet. The flavor soaks right into the fish.
Whisk your marinade in a bowl. A great base is olive oil, lemon juice, minced garlic, salt, and pepper.
Add spices like smoked paprika, dried dill, or a pinch of cayenne for heat. Place your dry cubes in the bowl and toss to coat.
Let the fish sit for at least 10 minutes. This allows the flavors to penetrate. You can cook it directly from the marinade.
Patting Dry and Cutting for Even Cooking
Whether you bread or marinate, start here. Patting your fillet completely dry with paper towels is the most important step.
Surface moisture is the enemy of crispiness. It creates steam in your cooking appliance, leading to soggy results instead of a golden sear.
Once dry, it’s time to cut. Use a sharp chef’s knife and a stable cutting board.
Aim for even, one-inch to one-and-a-half-inch cubes. This uniform size is key for consistent cooking.
Cut against the grain of the fish for more tender pieces. If some parts of the fillet are thicker, slice those cubes slightly smaller.
This balances the cooking time so all your bites are done perfectly together.
The Secret to Perfect Air Fryer Salmon Nuggets
The difference between a decent bite and an exceptional one often comes down to a few simple techniques. It’s not just about the ingredients you use. How you manage the final cooking process makes all the difference.
You can have the best quality fish and a fantastic coating. Without proper execution, the texture may not meet your hopes. These key steps ensure you get that ideal crisp-tender contrast every single time.
Preheating for the Best Crisp
Always start with a hot cooking appliance. This is the first non-negotiable rule for success.
Think of it like preheating an oven for baking. A hot environment instantly begins to sear the exterior. This creates that desirable golden crust right away.
If you add your food to a cold basket, it will start to steam. You’ll lose the chance for maximum crispiness from the very beginning.
Set your machine to 400°F and let it run for about three to five minutes. This simple habit guarantees a strong start for your recipe.
The Golden Rule: Don’t Overcrowd the Basket
Your second critical rule is giving each piece its own space. Arrange them in a single, uncrowded layer.
Hot air needs room to circulate freely around every bite. This circulation is what creates an even, crunchy texture on all sides.
If you pile them on top of each other, they will steam instead of crisp. The result is uneven cooking and a soggy coating.
It’s better to cook in two smaller batches than one overcrowded one. Patience here pays off with perfectly cooked results.
How to Know When They’re Perfectly Cooked
Judging doneness is easy once you know what to look for. Rely on a combination of time, visual cues, and temperature.
General cook time falls between 5 and 10 minutes total. Flip your pieces halfway through for even browning.
For a medium-rare center, aim for the lower end of that range. If you prefer well-done fish, cook for the full time.
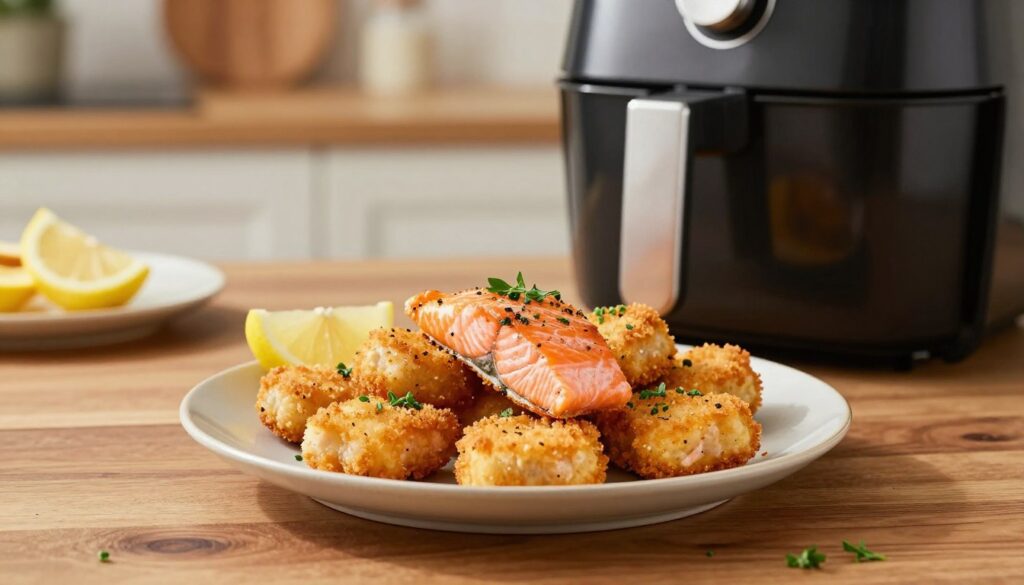
Visually, the outside should be a deep golden brown. The interior will turn from translucent to opaque and flake easily with a fork.
The most reliable method is using a meat thermometer. Insert it into the thickest part of a piece. The USDA recommends a safe internal temperature of 145°F.
Note that marinated versions may develop darker, caramelized edges. This is normal and adds fantastic flavor.
A crucial caution: avoid overcooking. This protein can dry out quickly. Remember, it continues to cook slightly from residual heat after you remove it.
Delicious Dipping Sauces & Serving Ideas
Your cooking journey doesn’t end when the timer beeps; it’s time to assemble and enjoy. The right accompaniments transform your golden pieces from a simple snack into a memorable meal.
Creative dips and thoughtful plating make all the difference. Let’s explore some fantastic ways to serve your creation.
Spicy Sriracha Mayo
This creamy, tangy condiment adds a kick that balances the rich flavor of your fish. It comes together in just one minute with two ingredients.
Combine equal parts mayonnaise and Sriracha hot sauce in a small bowl. Stir until you achieve a smooth, pink-orange sauce.
Adjust the ratio to control the heat level. For a hint of citrus, add a squeeze of fresh lime juice.
This versatile sauce is perfect for dipping. It also works wonderfully drizzled over a grain bowl or used as a sandwich spread.
Sweet Honey-Soy Glaze
For a sticky, savory-sweet alternative, try this simple glaze. It offers a beautiful contrast to the crispy exterior of your bites.
In a small saucepan, mix low-sodium soy sauce, honey, and a touch of minced garlic. Simmer for a few minutes until it thickens slightly.
You can brush this glaze on during the last minute of cooking for a caramelized finish. Alternatively, serve it on the side for dipping.
The combination of salty and sweet is always a crowd-pleaser. It pairs exceptionally well with sesame seeds and green onions.
Building the Ultimate Salmon Bowl
Turn your quick recipe into a complete, nutrient-dense lunch or dinner. Building a bowl is an easy way to pack in vegetables and whole grains.
Start with a hearty base. Cooked jasmine or brown rice is a classic choice. For a change, try quinoa or whole wheat noodles.
Next, add a variety of fresh vegetables for crunch and color. Sliced cucumber, edamame, shredded carrots, and leafy greens all work well.
Place your warm, cooked pieces right on top. Their heat will slightly wilt delicate greens, which adds wonderful texture.
Drizzle your chosen sauce generously over everything. The spicy mayo or honey-soy glaze from earlier are perfect matches.
Finish with flavorful garnishes. Sprinkle on sesame seeds, sliced green onions, chopped cilantro, or nori strips.
For extra protein and healthy fat, consider additional toppings. Roasted broccoli, creamy avocado slices, crushed nuts, or a fried egg are excellent additions.
This approach is similar to making a quick poke bowl at home. It’s a balanced, satisfying, and highly customizable meal.
You can also serve your bites alongside a simple green salad. A light vinaigrette complements them without overpowering their flavor.
Whether in a bowl, on a salad, or straight from the plate with a dip, you have endless options. Enjoy your creation your way.
Tips for Storage and Reheating
Leftovers don’t have to be a disappointment. With the right methods, they can be just as crispy and flavorful as the first serving.
Proper storage keeps your food safe. Smart reheating brings back that delightful texture.
This knowledge extends the value of your cooking efforts. You can enjoy your favorite recipe over multiple days.
Keeping Leftovers Fresh
Always let your cooked pieces cool completely at room temperature first. This prevents condensation inside your storage container.
Place them in an airtight container or a resealable bag. Store them in the refrigerator for up to three days.
For longer storage, freeze them on a parchment-lined sheet. Once solid, transfer them to a freezer bag.
They will keep well for about two months. This is perfect for quick future meals.
Use this table to choose the best reheating method for your needs. It compares the key factors for each technique.
| Method | Temperature / Setting | Time (Minutes) | Result | Best For |
|---|---|---|---|---|
| Air Fryer | 370°F (Preheated) | 2 to 4 | Restores crispiness best | Quick, quality reheating |
| Conventional Oven | 375°F | 5 to 8 | Good crisp, even heat | Larger batches |
| Microwave | High Power | 1 to 2 | Soggy texture | Speed only, not recommended |
How to Recrisp Your Nuggets
The best way to reheat is using your air fryer again. Preheat it to 370°F for the best results.
Place your pieces in a single layer in the basket. Do not overcrowd them to allow hot air to circulate.
Heat for two to four minutes, checking for warmth. A light spritz of oil before reheating helps re-crisp the exterior.
If using a conventional oven, set it to 375°F. Use a baking sheet and heat for five to eight minutes.
Avoid the microwave. It will steam the pieces and make them soggy every time.
For frozen bites, you can cook them directly from frozen. Just add a couple of extra minutes to the cooking time.
Following these steps ensures your meal stays delicious. You get that satisfying crunch back with minimal effort.
Related Recipes:
- Maple Salmon
- Lemon Rosemary Salmon
- Chef John’s Salmon
- Grilled Cod with Spinach and Tomatoes
- Baked Fish in Foil
Conclusion: Whip Up a Batch Tonight!
This method proves that eating well doesn’t require hours in the kitchen or complicated techniques. You have discovered a quick, healthy, and versatile solution for any day of the week.
The process is foolproof and easily adapted to your personal tastes. Whether you prefer a crispy coating or a bold marinade, the result is always delicious.
It’s a fantastic family-friendly meal, perfect for weekly meal prep. This is a smart way to enjoy nutritious fish regularly.
Share your creations online to inspire others. The simple steps—choose your fillet, prep it, cook to perfection, and enjoy with dips—deliver incredible flavor.
Gather your ingredients now. Experience the irresistible crunch of homemade salmon bites for dinner tonight.