


This post may contain affiliate links. If you purchase through these links, we may earn a commission at no extra cost to you.
Crisp autumn air and harvest scents can make your home feel magical. Family gatherings and Halloween parties bring comforting treats that recall happy childhood memories.
Making caramel apples at home turns ordinary autumn weekends into joyful moments. This guide explains how to choose crisp fruit, prepare smooth sugar coating, and dip each apple evenly.
You will learn tricks for solving kitchen problems, allowing treats to dry, and storing finished caramel apples safely. This trusted base method helps you create delicious seasonal snacks with confidence. Choose salted varieties, chocolate drizzles, crunchy nuts, or pretzel toppings.
Table of Contents
What Makes the Best Caramel Apples
Making the best fall treats starts with understanding what makes the best caramel apples. Each bite should balance flavors and let contrasting tastes work together.
A successful recipe depends on crisp fruit and rich caramel working together. This balance helps create the best caramel apples, worthy of any gourmet candy shop.
Choose Crisp, Tart Apples for Contrast
Your fruit choice sets the foundation for dessert. Choose firm, juicy, naturally acidic apples, such as Granny Smith, Honeycrisp, or Pink Lady.
Tartness cuts through the sugar’s heavy sweetness. Firm flesh keeps the fruit crunchy instead of mealy or soft under the thick coating.
Balance Soft Caramel With Fresh Fruit
The coating should complement, not overpower, the fresh fruit. You want a buttery, sweet, and pleasantly chewy layer that clings tightly to the skin. If it is too thick, the treat becomes hard to bite.
Medium-sized or smaller fruits make dipping much easier. Their size gives each bite a good fruit-to-candy ratio. That balance makes them ideal for children and party guests.
Ingredients and Equipment for Homemade Caramel Apples
To make your first caramel apple recipe, gather the right supplies. Good preparation prevents last-minute stress and kitchen spills. Choose a quick shortcut or cook the sugar from scratch.
Essential Ingredients for the Caramel Apple Recipe
Caramel candies or homemade caramel mixture
You have two main choices for your caramel base. Wrapped caramel candies melt quickly with a splash of cream. A traditional homemade caramel apples base uses raw ingredients.
Fresh apples, butter, cream, corn syrup, and flavorings
For scratch cooking, combine brown sugar, rich butter, heavy cream, and corn syrup. Add a pinch of salt and pure vanilla extract for deeper flavor. Choose firm, crisp, unwaxed fruit.
Helpful Tools for Dipping and Setting
Heavy saucepan, candy thermometer, parchment paper, and wooden sticks
A heavy-bottomed saucepan spreads heat evenly and helps prevent burning. Use a reliable candy thermometer to check the exact temperature. Sturdy wooden sticks and parchment paper help keep the process clean.
How to Prepare Your Workspace
Line a baking sheet with parchment paper before you begin. Put toppings in shallow bowls within easy reach. Dry apples completely; surface moisture keeps sugar from sticking.
| Category | Item Needed | Main Purpose |
|---|---|---|
| Fruit | Unwaxed Apples | Provides a crisp, tart base |
| Base | Caramels or Sugar | Creates the sweet coating |
| Tools | Candy Thermometer | Controls the final texture |
| Supplies | Parchment Paper | Prevents sticking during cooling |
How to Make Caramel Apples Step by Step
Making perfect caramel apples takes several simple, careful steps. Safe handling of hot ingredients and good timing create delicious fall treats.
1. Select and Wash the Apples
Start at the grocery store or a local orchard. Choosing the right fruit creates a strong base for your snack.
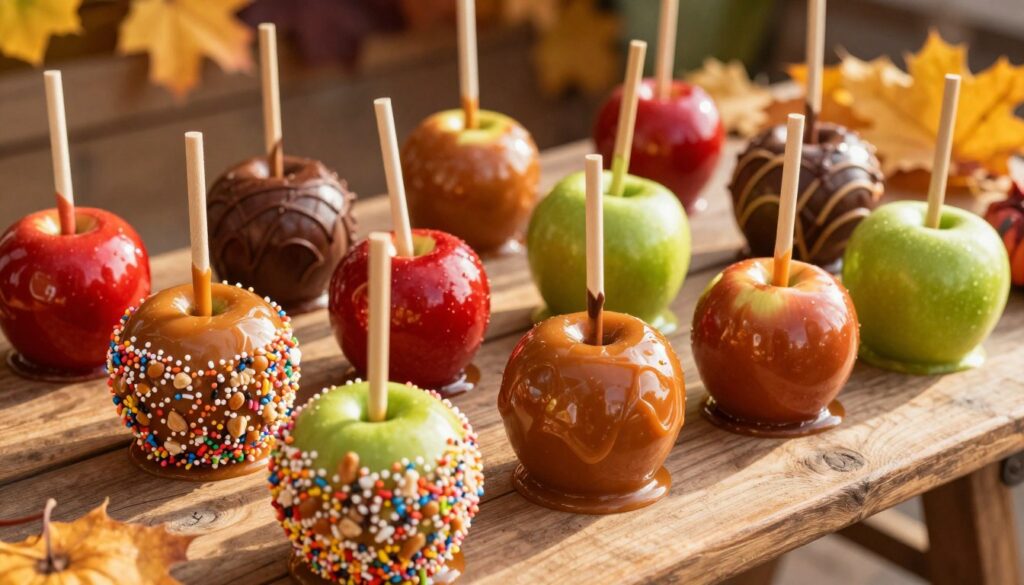
Choose firm varieties such as Granny Smith, Honeycrisp, or Pink Lady
Choose firm, unbruised fruit for the best texture. Tart, crisp varieties balance the sweet caramel coating.
Remove wax and dry the fruit completely
Wash the fruit in warm water to remove protective wax. Dry each apple completely with a clean towel so the coating sticks.
2. Insert the Sticks and Chill the Apples
After cleaning and drying the fruit, prepare it for dipping. Proper preparation keeps each apple secure on its stick.
Place sturdy wooden sticks through the stem ends
Push a heavy-duty wooden stick into the stem’s center. Insert it deeply enough to support the fruit’s weight.
Chill the apples briefly to help the caramel set
Place the prepared fruit in the refrigerator for twenty minutes. Cold fruit helps the hot coating grip the surface faster.
3. Prepare a Smooth Homemade Caramel Coating
Rich caramel requires careful temperature control and quality dairy ingredients. Watch the stove closely during this step.
Combine butter, brown sugar, heavy cream, corn syrup, and salt
Put these ingredients in a heavy-bottomed saucepan over medium heat. Stir gently until the butter melts and sugar dissolves.
Cook the mixture to the correct temperature
Attach a candy thermometer to the pan. Cook until the mixture reaches the soft-ball stage, stirring constantly to prevent scorching.
Stir in vanilla after removing the caramel from the heat
Remove the pan from the burner when it reaches the target temperature. Quickly whisk in vanilla extract to protect its rich flavor.
4. Test the Caramel Before Dipping
Do not skip testing if you want professional-looking caramel apples. A quick test can prevent sticky failures.
Check the texture with a chilled spoon or small apple piece
Drop hot caramel onto a cold surface or test piece. See how it holds its shape after cooling for one minute.
Adjust thick caramel with cream and thin caramel with additional cooking
Add warm heavy cream if the caramel is too thick. Cook it for another minute if it seems too runny.
5. Dip and Coat Each Apple
This is the most exciting step. Work steadily while the caramel stays warm and easy to spread.
Rotate the apple slowly for an even layer
Hold the wooden stick firmly and tilt the saucepan. Rotate the apple slowly to cover its surface up to the stem.
Allow excess caramel to drip back into the pan
Hold each coated apple above the pot for several seconds. Let heavy pools drip back into the saucepan.
Place each apple on parchment before adding toppings
Place each caramel apple on greased parchment paper. Add nuts or candies while the surface remains sticky.
6. Let the Caramel Apples Set
Letting the treats rest helps the coating stay in place. Patience creates a clean presentation.
Cool the apples at room temperature or in the refrigerator
Let the treats firm on the counter, or refrigerate them for faster setting. Chilling creates a firmer bite; room temperature creates a softer chew.
Separate finished apples with parchment paper
Wrap the bases or place parchment squares between them. This simple step keeps the sweet treats from sticking together.
7. Check the Finished Texture Before Serving
A final check helps ensure your caramel apples look and taste great. Fixing small flaws takes only seconds.
Look for a soft, chewy coating that does not slide off
Check that the coating hugs the fruit tightly. A quality batch has a thick, chewy layer that stays in place.
Correct small cracks, bubbles, or exposed areas
Warm a little leftover coating to patch bare spots. Smooth air bubbles gently with a clean finger or small spatula.
Three Easy Caramel Apples Recipes to Try
Turning ordinary fruit into stunning gourmet caramel apples is easier than you might think. A strong base recipe lets you create flavors with sea salt, chocolate, or nuts for guests. These three variations can delight guests and build your kitchen skills.
Classic Salted Caramel Apples
Ingredients and preparation
Gather chilled apples, wooden sticks, and a batch of homemade buttery caramel. Dip each apple into warm caramel, then let extra caramel drip into the pot. Set each coated apple on parchment paper to catch stray drips.
Finishing with flaky sea salt
While the coating stays warm and tacky, sprinkle a small pinch of flaky sea salt on top. This creates the sweet and savory balance that defines true gourmet caramel apples. Let the apples set fully at room temperature before slicing or wrapping them for friends.
Chocolate-Dipped Caramel Apples
Adding melted semisweet or milk chocolate
If you love rich cocoa flavors, try this decadent twist on traditional autumn snacks. Let the first caramel coating firm completely on parchment paper. Then melt high-quality semisweet or milk chocolate in a microwave-safe bowl until smooth.
Allowing the chocolate layer to set properly
Dip the hardened caramel base into melted chocolate, or drizzle artistic patterns with a spoon. Return the treats to clean parchment paper or refrigerate them briefly. Do not chill them too long, or condensation may form on the glossy shell.
Gourmet Caramel Apples With Nuts and Pretzels
Using toasted pecans, peanuts, almonds, or crushed pretzels
Texture helps create memorable desserts for family and friends. Chop toasted pecans, peanuts, almonds, or salty pretzels into small pieces. Spread your toppings across a shallow baking dish for easy rolling.
Combining sweet, salty, and crunchy textures
Press toppings into the fresh caramel layer right after dipping, while it remains soft. Do not overload the fruit because extra weight can pull down the heavy coating. These gourmet caramel apples offer a pleasing mix of sweet, salty, creamy, and crunchy bites.
| Recipe Variation | Primary Topping | Flavor Profile | Best Setting Method |
|---|---|---|---|
| Classic Salted | Flaky Sea Salt | Sweet & Savory | Parchment Paper |
| Chocolate-Dipped | Semisweet Chocolate | Rich & Decadent | Short Fridge Chill |
| Nut & Pretzel | Toasted Nuts & Pretzels | Crunchy & Salty | Immediate Press |
Caramel Apple Topping Ideas and Dipping Sauce Options
Explore fun caramel apple topping ideas to elevate autumn snacks. The right mix of textures and flavors can turn a simple homemade treat into an unforgettable dessert. Keep reading to learn how to customize your kitchen creations.
Classic Toppings for Fall Snacks
Traditional flavors always please a crowd during autumn. Apply these toppings while the coating is warm, so they stick securely.
Chopped peanuts, walnuts, pecans, coconut, and mini chocolate chips
Nuts add a wonderful crunch that contrasts with the chewy sweetness. Make sure your ingredients are completely dry and finely chopped before dipping.
Creative Gourmet Caramel Apple Combinations
For a bold, adventurous treat, mix and match pantry staples. These flavor combinations will impress guests at any autumn gathering.
Cookie crumbs, crushed cereal, cinnamon sugar, and dried fruit
Cinnamon sugar paired with crisp fruit creates a warm spice profile. Dark chocolate also works wonderfully with toasted pecans.
White chocolate drizzle and seasonal sprinkles
A delicate white chocolate drizzle and dried cranberries create a tart contrast. Let the base layer firm up slightly before adding decorative drizzles.
How to Make a Caramel Apple Dipping Sauce
Sometimes you want delicious flavor without biting into a hard, whole fruit. Making a quick caramel apple dipping sauce solves this problem instantly.
Thin extra caramel with warm cream
Simply take your leftover coating and thin it with a small splash of warm cream. Continue until it reaches a smooth, spoonable consistency.
Serve the sauce with apple slices for easy sharing
Serve the warm bowl with freshly cut fruit slices for a party-friendly snack. This method works especially well for young children who might struggle with whole treats.
Common Caramel Apple Problems and How to Fix Them
Making sweet apple treats can bring unexpected kitchen challenges. If sticky caramel will not cooperate, a few simple changes can fix the problem.
Why the Caramel Slides Off the Apples
Remove wax, dry the apples, and chill them before dipping
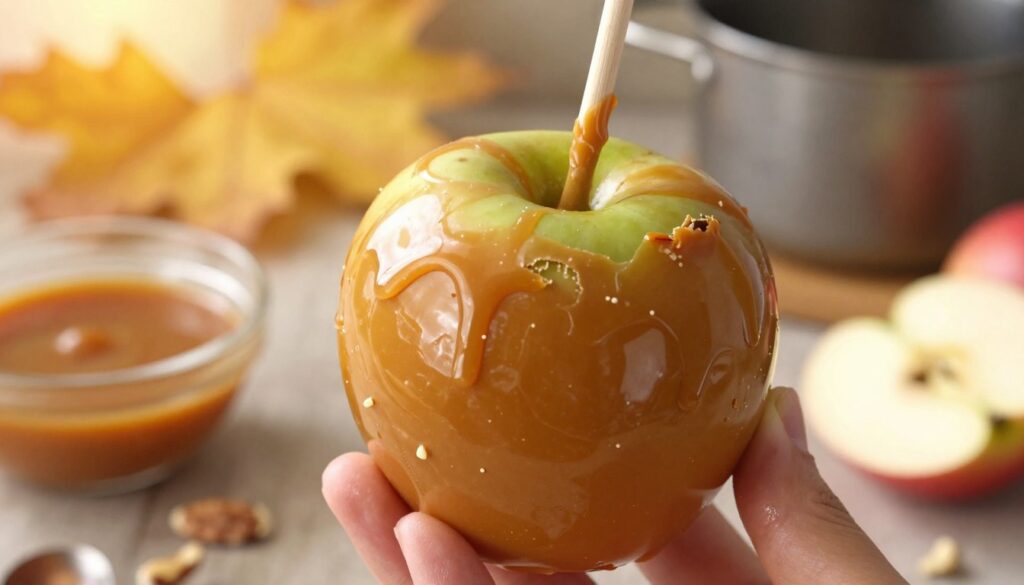
The coating may slide down because the apples have protective wax or surface moisture. Wash them with warm water, dry them fully with a towel, and chill them briefly in the fridge.
Why the Caramel Is Too Hard or Too Soft
Use a candy thermometer and avoid undercooking or overcooking
Temperature control helps create the right texture. Undercooked sugar stays runny, while overcooked batches become brittle and can hurt your teeth. Use a reliable candy thermometer and watch the heat closely.
How to Prevent Grainy Caramel
Dissolve sugar fully and avoid stirring after boiling begins
A grainy texture ruins a smooth, velvety bite. Let the sugar dissolve fully before the mixture starts to bubble. Never stir the pot after the liquid begins boiling.
How to Repair Uneven Coating and Air Bubbles
Rotate the apple slowly and tap the stick gently after dipping
Uneven spots appear when the sauce cools too quickly or becomes too thick. Rotate the apple slowly and keep the mixture warm for an even layer. Tap the stick gently against the pot to release trapped air bubbles.
Serving, Storing, and Sharing Caramel Apples
Proper handling keeps your sweet seasonal creations fresh, safe, and ready to enjoy. Good presentation and storage help homemade snacks delight everyone who tries them. These steps help caramel apple gift baskets stay appealing and ready to share.
How to Store Finished Caramel Apples
Wrap each apple individually in food-safe cellophane, wax paper, or parchment. Leave enough room so the sticky coating does not touch the wrapping.
Refrigeration helps when your kitchen runs warm or when you store treats longer. Bring apples to cool room temperature before serving for the best texture.
How to Cut Caramel Apples for Children and Parties
Slice each apple into neat wedges, and remove the sticks before serving guests. This makes sharing easier and cleaner.
Supervise young children closely because firm caramel can be sticky and hard to bite. Pre-sliced wedges reduce dental strain and make snacking safer.
How to Build Caramel Apple Gift Baskets
Build caramel apple gift baskets with wrapped fruit, apple cider, napkins, chocolate, nuts, and other fall treats. Use food-safe packaging and place items securely.
Always include written storage instructions so recipients know when and how to enjoy their treats.
| Storage Method | Ideal Duration | Best Temperature |
|---|---|---|
| Room Temperature | 1 to 2 days | Cool and dry (60°F – 65°F) |
| Refrigerator | 3 to 5 days | Chilled (35°F – 40°F) |
| Gift Box | 24 to 48 hours | Ambient room climate |
Plan a Caramel Apple Season at Home
Turn crisp autumn months into a memorable food celebration at home. Make a simple weekend activity a family tradition that brings extra joy. Let your family enjoy the magic of the ultimate caramel apple season with fun planning ideas.
When to Make Caramel Apples
Use the fall harvest season for parties, school events, and weekend snacks
The autumn harvest offers fresh fruit that pairs well with warm confectionary coating. Plan your caramel apple season cooking sessions around Halloween gatherings, neighborhood parties, and Thanksgiving weekend treats.
Plan ahead so your sweet creations set before guests arrive. Choose a cool afternoon so the candy hardens into a crisp, shiny shell without melting.
How to Prepare a Caramel Apple Bar
Set out apples, warm caramel, dipping sauces, and labeled toppings
During caramel apple season, set up an interactive dessert station for visitors of all ages. Arrange washed fruit, sturdy wooden sticks, and warm pots of sweet coating on a sturdy table.
Provide parchment-lined trays and organized bowls filled with crushed nuts, sprinkles, and mini chocolate chips. Use separate utensils for each item to keep the serving station clean.
| Event Type | Best Apple Variety | Top Recommended Toppings |
|---|---|---|
| Halloween Party | Granny Smith | Crushed cookies and gummy worms |
| Family Movie Night | Honeycrisp | Sea salt and chopped pecans |
| Thanksgiving Gathering | Braeburn | Toasted walnuts and cinnamon sugar |
Conclusion
Making delicious caramel apples turns your kitchen into a sweet autumn haven. Start with crisp, tart fruits, and remove all surface wax. Clean skin helps sticky coatings grip the surface without slipping.
Prepare your workspace before heating sugar ingredients. Control stove temperatures carefully to prevent burnt batches. Test a small drop on a cold plate to check the right consistency.
Let each coated snack cool and set completely before serving. Traditional treats taste wonderful with flaky salt or melted chocolate. For extra crunch, roll warm treats in chopped nuts, crushed pretzels, or cookie crumbs.
Store finished snacks safely in the refrigerator until party time. Cut treats into neat wedges so children and guests can share them easily.
Make the classic version for your next autumn gathering. Create an interactive caramel apple bar so friends can choose their favorite toppings.
