This post may contain affiliate links. If you purchase through these links, we may earn a commission at no extra cost to you.
Air-Fryer Breaded Sea Scallops
Do you ever crave a restaurant-quality seafood dinner at home? You dream of that ideal texture—a satisfying crunch that reveals a juicy, tender center. Traditional pan-frying can feel like a risky guessing game.
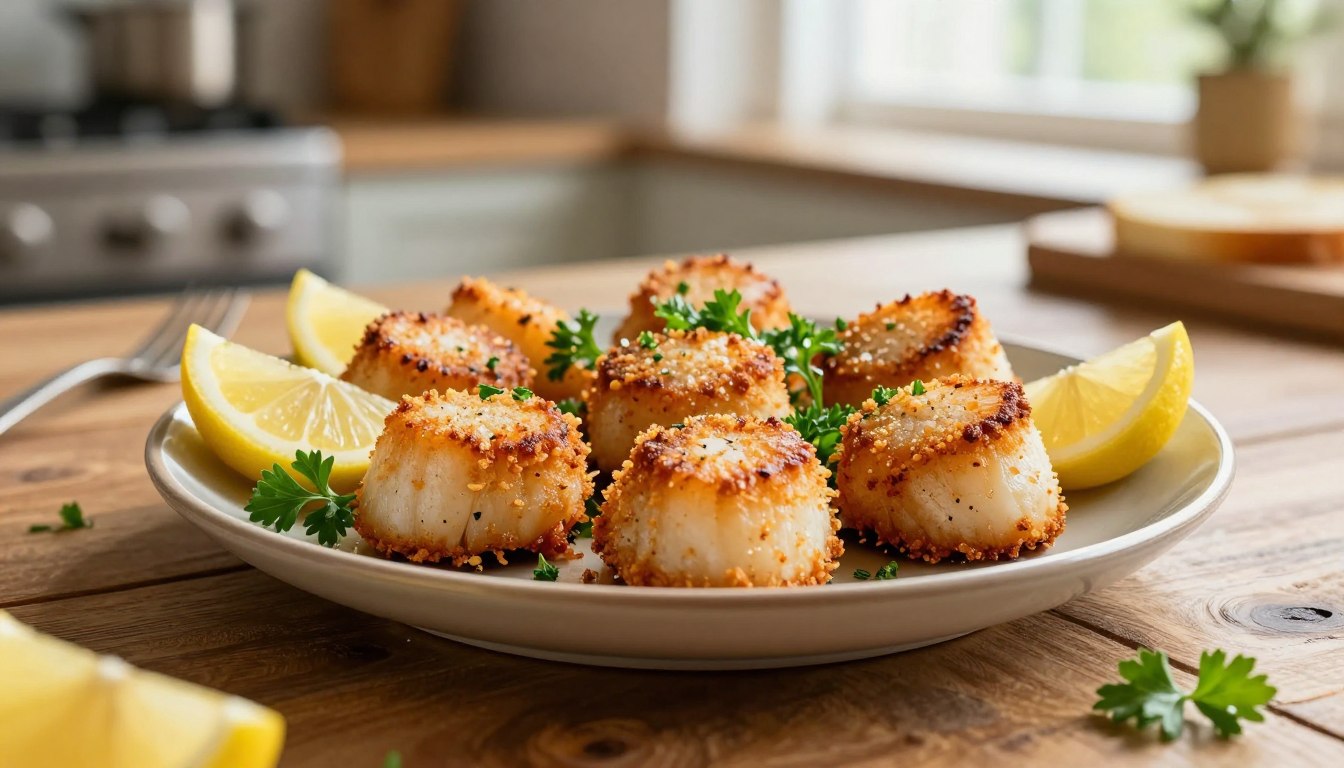
This reliable Air-Fryer Breaded Sea Scallops is your answer. It guarantees a crispy, golden-brown exterior with a moist, perfectly cooked interior. Your countertop appliance handles the precision, removing all the stress.
The magic lies in a simple coating. Panko breadcrumbs create an incredible texture. Grated parmesan cheese adds a salty, savory note. Your total time commitment is just about 20 minutes from prep to plate.
You also get a healthier result. It uses minimal fat compared to deep-frying. This guide is built for cooks of every level. We’ll cover everything from picking the best ingredients to expert tips for serving your stunning meal.
Why You’ll Love This Air Fryer Scallop Recipe
Imagine achieving a gourmet sear on delicate seafood without hovering over a hot stove. This approach removes the common frustrations associated with pan-frying.
Your countertop appliance delivers consistent, hands-off results. It eliminates the guesswork for a perfect sear. You get a beautifully browned exterior and a tender, moist interior every single time.
You will appreciate the speed and simplicity. The health benefits are a significant plus. Cleanup becomes a minor task instead of a major chore.
Quick and Easy Weeknight Dinner
Busy evenings demand efficient solutions. This Air Fryer Breaded Sea Scallops is ideal for a fast, impressive meal. Your total active cooking time is just 10 to 15 minutes.
You can start from frozen or thawed protein. The appliance handles the precision. Rapid air circulation creates that desirable crispy crust.
It uses far less oil than traditional stovetop searing. You avoid the splatter and constant monitoring. The result is a stress-free path to a restaurant-style dish.
Healthier Than Traditional Frying
Indulgent texture doesn’t require cups of fat. This technique uses a minimal amount of oil. A simple spritz of olive oil spray is often enough.
You dramatically reduce the overall fat content. The finished morsels are not greasy or heavy. They retain their light, crispy quality perfectly.
Cleanup is remarkably easy. Most appliance baskets are dishwasher-safe. A quick wipe is often all that’s needed.
You enjoy all the flavor and crunch of fried food. It comes with a fraction of the mess and calories. This makes the recipe a smart choice for regular meals.
Essential Ingredients for Breaded Sea Scallops
Let’s break down the key elements that create the ideal crunchy coating and tender bite. Your success starts with smart shopping and a simple blend of pantry staples.
Each component has a specific job. Together, they build layers of texture and taste. We’ll focus on the protein, the crisp coating, and the fats that bind it all.
Choosing the Right Scallops: Sea vs. Bay
Not all varieties are created equal for this recipe. You have two main choices at the fish counter.
Sea scallops are the superior pick. They have a meaty, substantial texture. Their larger size provides a perfect canvas for the coating.
Bay scallops are much smaller and sweeter. They are better suited for quick sautés or chowders. For breading and crisping, the heft of sea scallops is essential.
Always look for “dry” packed seafood. This means they are not treated with chemical solutions. Dry scallops sear better and offer pure, clean flavor.
If you start with frozen product, thaw it completely. Ice crystals create excess moisture. This steam will prevent proper browning and make the coating soggy.
The Breading Mix: Panko and Parmesan
This duo is responsible for the signature crunch and color. It’s more than just a covering; it’s a flavor layer.
Japanese-style panko breadcrumbs are airy and flaky. They create an unparalleled, light crispness that shatters beautifully. Traditional fine breadcrumbs can become dense.
Grated Parmesan cheese is the secret weapon. It adds a savory, umami depth. The cheese also encourages faster, more even browning for a gorgeous golden finish.
The seasonings mixed in provide the foundational taste. Garlic powder delivers consistent aroma without burning. A good seafood seasoning blend adds complexity.
Key Seasonings and Fats
The final touches define your dish’s character. Your choice of fat and seasoning balance is crucial.
Melted butter is the classic choice for dipping. It adds a rich, nutty flavor and helps the dry mixture stick firmly. For a dairy-free option, olive oil works perfectly.
Your core seasoning blend should include:
- Garlic powder: For a warm, aromatic base note.
- Seafood seasoning (like Old Bay): A blend of spices that complements the natural sweetness.
- Salt and black pepper: Essential for enhancing all the other flavors.
A pro tip: if you use seasoned panko, taste your mix first. You may need to reduce the added salt and pepper. With plain crumbs, season generously for full flavor.
How to Prepare Your Scallops for Cooking
Your journey to a flawless meal begins with two simple, yet critical, preparation steps. Skipping them is the main reason coatings fail to stick or turn out soggy.
You must handle the main ingredient with care before it ever sees heat. This upfront work guarantees the crispy, golden result you want.
Thawing Frozen Scallops Safely
If you start with frozen scallops, proper thawing is your first task. The refrigerator method is best for quality and safety.
Place the sealed package on a plate in the fridge overnight. For a quicker method, submerge the sealed bag in a bowl of cold water. Change the water every 30 minutes.
Avoid using the microwave. It can partially cook the edges and create a mushy, uneven texture. Never cook from frozen for a breaded recipe.
Excess moisture from ice crystals will steam during cooking. This steam forces the coating to slide right off.
Patting Scallops Dry for Optimal Breading
This is the single most important prep step. You must remove every bit of surface moisture.
Place your thawed protein on a stack of paper towels. Gently press another towel on top to absorb all liquid.
Any water left on the surface creates steam in the hot air. Steam is the enemy of a crisp crust. It leads directly to a soggy, disappointing coating.
For an extra tip, you can soak the raw pieces in milk for 10 minutes first. This can neutralize any potential strong odor. Just remember to pat them perfectly dry afterward.
Allowing time for these steps ensures your base is ready. Plan for about 10 minutes of active prep once your frozen scallops are fully thawed.
If you enjoy simple homemade comfort meals like this Air Fryer Breaded Sea Scallops, you might also love these easy recipes:
- Maple Salmon
- Lemon Rosemary Salmon
- Chef John’s Salmon
- Grilled Cod with Spinach and Tomatoes
- Baked Fish in Foil
Step-by-Step: How to Make Air Fryer Breaded Sea Scallops
Let’s walk through the cooking process together, from preheating your appliance to plating your masterpiece. This sequence turns your prepared ingredients into a beautifully crisp and tender dish.
Preheating Your Air Fryer to 400°F
Your first step is crucial for success. Always preheat your air fryer to 400°F for about five minutes.
This ensures the basket is intensely hot when your food goes in. That immediate heat kickstarts the searing process. It locks in juices and helps the coating set fast for a consistent crunch.
Never skip this step. A cold start can lead to uneven cooking and a less crispy finish.
Coating Scallops in Butter and Breading Mixture
Set up two shallow bowls for a streamlined workflow. This keeps your hands clean and the process efficient.
In your first bowl, place your melted butter (or olive oil). In the second, combine the panko, grated Parmesan, garlic powder, and your chosen seasoning blend.
Take your thoroughly dried seafood pieces. Season them lightly with black pepper (and salt if your butter is unsalted). Now, follow this simple coating method:
- Dip: Submerge each scallop fully in the melted butter.
- Press: Transfer it to the dry mixture. Firmly press the crumbs onto all sides to create an even, generous layer.
Lightly spray your preheated air fryer basket with oil. This prevents any sticking during the cooking time.
Cooking Time and Flipping for Even Crispiness
Place your coated pieces in the basket in a single layer. Do not let them touch. This space is vital for proper hot air circulation.
Set your appliance to 400°F. The total time to cook scallops is typically 10 to 15 minutes.
Flip them halfway through the cycle. This simple action guarantees an evenly golden and crisp texture on both sides.
How do you know they’re done? The exterior will be a deep golden brown. The flesh inside will turn opaque and firm.
For absolute precision, use a meat thermometer. The internal temperature should reach at least 125°F.
Remember, cooking minutes can vary. The size of your pieces and your specific appliance model are factors. Check a minute or two before the timer ends to avoid overcooking.
Expert Tips for Perfect Scallops Every Time
Unlock consistently flawless outcomes by focusing on three expert-level strategies. These techniques bridge the gap between a simple recipe and a truly magnificent meal.
You will learn how to defend against a soggy crust. We’ll eliminate all guesswork for perfect doneness. Managing your appliance’s capacity is also key for ideal texture.
Avoiding Soggy Breading with Proper Drying
Your primary defense against disappointment is a completely dry surface. Make sure you pat each piece thoroughly with a paper towel.
Any residual moisture creates steam during the cook. This steam is what forces the coating to slide off or become limp. It’s the most common reason for a failed crust.
For an ultra-even, fine texture on your coating, try a quick kitchen hack. Pulse your panko and Parmesan in a food processor for a few seconds. This creates a finer crumb that adheres beautifully to your seafood.
Using a Thermometer for Perfect Doneness
Stop guessing when your food is done. The most reliable tool is an instant-read kitchen thermometer.
Insert the probe into the thickest part of a scallop. You are aiming for an internal temperature of 125°F. At this point, the flesh is opaque, tender, and perfectly cooked.
This method guarantees you never end up with a rubbery, overdone texture. It takes the stress out of timing, especially since size can vary. Your results will be professional every time.
Best Amazon Picks:
Batch Cooking to Prevent Overcrowding
Resist the urge to fill your air fryer basket to the brim. Overcrowding is a major mistake.
When pieces are touching, hot air cannot circulate freely. They will steam instead of crisp, leading to a soggy, uneven cook. Always arrange your ingredients in a single layer with space between them.
If your appliance is small, cook scallops in batches. Keep the first batch warm on a baking sheet in a 200°F oven while you finish the second.
For a super-crispy finish, give your coated pieces a light spritz of olive oil spray before they go in the fryer. This promotes gorgeous, all-over browning.
When it’s time to flip, gentle handling prevents the coating from falling off. Use silicone-tipped tongs to carefully turn each piece halfway through.
Finally, remember that all appliances are different. The stated cooking minutes are a guideline. A model like a Ninja Dual Zone might achieve perfect results in about 10 minutes. Make sure you get to know your own air fryer‘s performance.
Ingredient Substitutions and Flavor Variations
Personalize your next seafood dish with simple swaps to suit your taste and pantry. This recipe is a fantastic template for creativity.
You can adjust the core ingredients to match dietary needs or explore new flavor profiles. The method remains the same, but the result feels entirely new.
Alternative Breadcrumbs and Seasonings
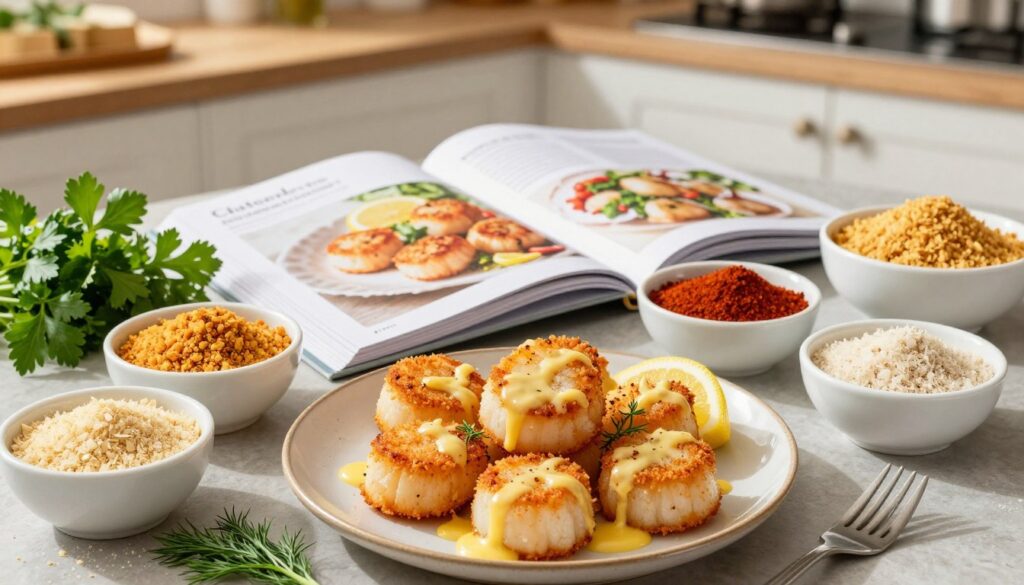
Your choice of coating defines the final texture. Panko is the gold standard for a light, shattering crunch.
Other options work well too. Each brings a unique quality to your meal.
| Breadcrumb Type | Texture Result | Best For |
|---|---|---|
| Panko | Light, flaky, extra crispy | Classic crunch |
| Regular Breadcrumbs | Denser, finer coating | Even browning |
| Italian-Seasoned Breadcrumbs | Savory, herby flavor | Quick flavor boost |
| Gluten-Free Panko | Crispy (similar to panko) | Dietary restrictions |
Your seasoning blend is where you can truly experiment. Move beyond Old Bay or classic bay seasoning.
Try Cajun or blackened blends for a spicy kick. Lemon pepper offers a bright, zesty note. Herbes de Provence adds an elegant, herbal aroma.
For a finer, more adhesive coating, pulse your panko and Parmesan in a food processor. This creates a powder-like texture that sticks beautifully.
You can also mix in grated lemon zest or a pinch of cayenne powder. These small additions create big flavor changes.
Feel free to swap the cheese. Pecorino or Asiago are excellent salty alternatives. Always taste your mix if using pre-seasoned crumbs.
You may need to reduce added salt. This ensures your dish isn’t overly salty.
Swapping Butter for Olive Oil
Butter provides a rich, nutty taste. It’s perfect for binding the coating. You can use other fats with great success.
Olive oil is a popular alternative. It yields a slightly fruitier, lighter taste. Avocado oil has a high smoke point and neutral flavor.
Margarine works for a dairy-free option. The binding quality remains the same. The final crispiness will be excellent.
Some recipes use an egg wash instead of melted butter. This can alter the final texture, making it slightly less shatteringly crisp.
If you use an egg wash, whisk one egg with a tablespoon of water. Dip your dried seafood pieces in this mixture before the crumb coating.
Remember, the type of oil or fat you choose influences the final taste. Experiment to find your favorite combination.
This adaptability makes the dish a reliable favorite. You can create different versions from one master recipe.
What to Serve With Your Air Fryer Scallops
Choosing the right accompaniments transforms your dish from a simple recipe into a complete, memorable meal. The right sides enhance texture and taste.
They balance richness with freshness. Your plate becomes a harmonious experience. Think about contrast and complementary flavor profiles.
Classic seafood pairings are always a hit. A squeeze of fresh lemon brightens every bite. Tartar sauce or a zesty cocktail sauce adds a creamy, tangy counterpoint.
Light Sides: Salads and Vegetables
Fresh, crisp elements cut through the richness beautifully. A simple arugula salad with shaved Parmesan is perfect. Toss it with a lemon vinaigrette for a bright finish.
Your countertop appliance can handle side dishes too. Roasted broccoli or zucchini slices cook quickly. They develop a lovely caramelized edge.
For a special touch, try bacon-wrapped asparagus. Brussels sprouts with a bit of bacon are another winner. These options add a savory, smoky note.
Don’t forget to season your vegetables well. A pinch of salt and pepper makes all the difference. Fresh herbs like dill or parsley add a final flourish.
Hearty Accompaniments: Rice, Pasta, and Potatoes
Sometimes you crave a more substantial base. Creamy risotto or garlic Parmesan pasta creates a filling main course. The starch soaks up all the delicious juices.
Mashed potatoes offer classic comfort. Scalloped potatoes bring a cheesy, baked goodness. Parmesan polenta cakes provide a crispy, creamy textural play.
This main dish pairs well with many cuisines. Try it with Asian-inspired fried rice. A simple couscous with roasted vegetables works wonderfully.
For a quick meal, canned beans or lentils are nutritious and fast. Summer squash or green beans sauté in minutes. These recipes keep your total time in check.
Coordinate your cooking for a smooth service. Start longer-cooking sides like risotto first. Quick-roast vegetables in your appliance during the last few minutes.
This versatility makes planning easy. You can create different recipes from one master method. Your seafood dinner will always feel new and exciting.
How to Store and Reheat Leftover Scallops
Knowing how to handle leftovers properly ensures your culinary effort extends beyond a single meal. With the right techniques, you can enjoy your cooked seafood again with nearly the same great texture.
This guide covers the best practices for keeping your food safe and delicious. You will learn the optimal way to store it in the fridge. We also detail the only method that successfully restores the crispy coating.
Refrigeration Guidelines for Maximum Freshness
Your first step is to let the cooked pieces cool completely at room temperature. This should take no more than thirty minutes. Do not seal hot food in a container.
Place your leftovers in a single layer inside an airtight container. If you need to stack them, separate layers with parchment paper. This prevents the coating from becoming damp and soft.
Properly stored, your cooked seafood will stay fresh in the refrigerator for 3 to 4 days. For the best quality, try to enjoy it within two days.
You can freeze the leftovers, but the results are not ideal. The delicate interior often becomes rubbery upon thawing. The crispy exterior almost always suffers.
Reheating in the Air Fryer for Crispy Results
Your countertop appliance is the champion for reviving leftovers. It uses hot air to re-crisp the coating without making the inside dry. Avoid the microwave, as it will steam the food and create a soggy mess.
Follow these simple steps for success:
- Preheat your air fryer to 350°F. This is a lower temperature than the initial cook to warm the interior without overcooking it.
- Place your leftover pieces in the basket in a single layer. Do not overcrowd them. Hot air needs space to circulate.
- Reheat for 3 to 5 minutes, checking halfway through. They are ready when warmed through and the exterior is crisp again.
If you have a large batch, reheat in multiple rounds. Cooking too many at once leads to uneven warming. The texture will not be as good.
A common question is about frozen scallops that were already cooked. Yes, you can reheat them directly from frozen using this method. Just add a couple of extra minutes to the time.
While reheated pieces are delicious, they are best enjoyed fresh. Try to cook scallops in the quantity you need for immediate serving. This guarantees the perfect experience every time.
Troubleshooting Common Scallop Cooking Issues
If your coating isn’t sticking or the texture turns out tough, don’t worry—these problems have straightforward fixes. Let’s tackle the two most frequent challenges you might face.
Understanding the root cause is the first step to a perfect result every time. This guide will help you diagnose and solve these issues quickly.
Preventing Breading from Falling Off
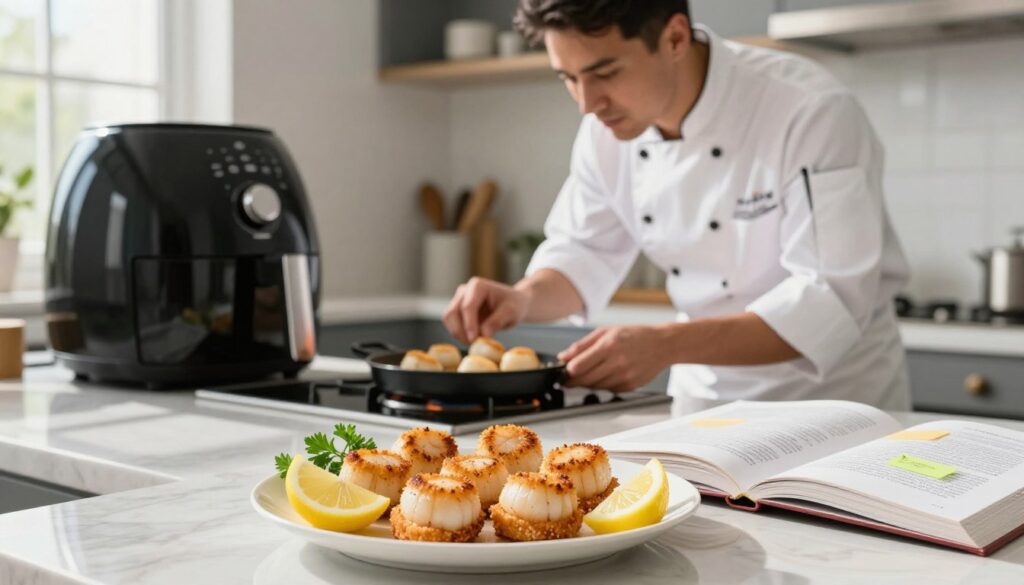
A loose coating usually points to one primary enemy: excess moisture. Water on the surface creates steam during the cook. This steam pushes the crumbs right off.
Your solution is a two-part process. First, you must pat each piece completely dry with paper towels. Second, press the crumb mixture firmly onto all sides.
Other factors can contribute to detachment. Did you skip the binding agent? Melted butter or olive oil is essential. It acts like a glue for the dry ingredients.
Over-handling your seafood after coating can also cause loss. Be gentle when transferring them to your appliance’s basket. Use a light touch with your tongs when flipping.
Resist the urge to constantly check or shake the basket. Frequent movement can dislodge the crust. Trust the cooking process you’ve set up.
Avoiding Overcooked or Rubbery Texture
Perfect doneness happens in a narrow window. The ideal internal temperature is between 125°F and 130°F. At this point, the flesh is opaque, tender, and juicy.
Cook them too long, and the proteins tighten dramatically. They become tough and chewy. This often happens at temperatures above 145°F.
Your appliance’s high heat cooks food fast. Always set a timer. The total time is usually just 10 to 15 minutes.
What if you slightly overcook them? You can still salvage your meal. Serve them immediately with a sauce or a squeeze of lemon juice. The added moisture helps counteract dryness.
The size of your pieces matters greatly. Larger varieties are more forgiving. Smaller ones can go from perfect to overdone in mere seconds.
Remember, this cooking method is generally very forgiving. Even with minor hiccups, your results will be delicious. You’ll gain confidence with each attempt.
Related Recipes:
- Maple Salmon
- Lemon Rosemary Salmon
- Chef John’s Salmon
- Grilled Cod with Spinach and Tomatoes
- Baked Fish in Foil
Conclusion
This reliable method turns a gourmet technique into an accessible weeknight staple. You get easy, fast, and healthy results in minutes. Your air fryer delivers consistent, crispy perfection and saves you time.
Feel free to experiment with different seasonings and coatings. This recipe is a versatile foundation for your creativity. It democratizes a restaurant-quality seafood cooking technique for your home kitchen.
We encourage you to try this dish tonight. Share your delicious creation with friends and family. Then, explore other great meals you can make in your countertop appliance.
Remember the simple process: dry, coat, air fry, and enjoy. We’re confident this will become your go-to for impressive dinners. Always start with high-quality, dry-packed scallops for the best flavor and texture.