Introduction
Tired of rubbery, overcooked chicken that leaves your family reaching for the ketchup? Say goodbye to disappointing dinners and hello to succulent, golden-brown Garlic Chicken Thighs that practically fall off the bone. This foolproof one-pan recipe delivers restaurant-quality results with crispy skin, tender meat, and an irresistible garlic aroma that’ll have everyone asking for seconds.
As a culinary instructor with over 15 years of experience teaching home cooks, I’ve perfected this technique through countless kitchen experiments and student feedback. The secret lies in understanding how chicken thighs cook differently from breasts – they’re more forgiving, naturally juicy, and packed with flavor.
In this comprehensive guide, you’ll discover everything from selecting the perfect thighs at the grocery store to mastering the ideal cooking temperature. We’ll cover essential prep techniques, professional cooking tips, creative flavor variations, and answers to the most common questions I receive from students.
Table of Contents
Why This Meat Recipe Works
This Garlic Chicken Thighs recipe has become a weeknight staple for thousands of home cooks, and here’s exactly why it delivers every single time:
- Uses affordable, family-friendly cuts of meat – Chicken thighs cost significantly less than breasts while delivering superior flavor and juiciness that’s nearly impossible to overcook
- Ready in just 35 minutes from start to finish – Perfect for busy weeknights when you need a satisfying meal without spending hours in the kitchen
- One-pan convenience means minimal cleanup – Everything cooks together in a single skillet, reducing both prep time and dishwashing
- Naturally stays moist and tender – The higher fat content in thighs prevents the dry, stringy texture that plagues many chicken recipes
- Scales perfectly for any family size – Whether cooking for two or ten, this method adapts seamlessly to your needs
Choosing the Right Meat
Getting the best results starts with selecting quality chicken thighs that will cook evenly and taste amazing.
Best Cuts for This Recipe
Bone-in, skin-on chicken thighs are absolutely essential for this recipe’s success. The bones act as natural heat conductors, ensuring even cooking throughout the meat, while the skin becomes beautifully crispy and protects the meat from drying out. Boneless thighs cook too quickly and often turn rubbery, while skinless varieties lack the rich flavor and appealing texture that makes this dish special.
Look for thighs that are roughly the same size – ideally 5 to 7 ounces each – so they finish cooking at the same time. Avoid packages with wildly different sizes, as smaller pieces will overcook while larger ones remain underdone.
Buying Tips
When shopping for your Garlic Chicken Thighs, examine the meat carefully for freshness indicators. The skin should appear pale yellow to light pink without any gray or greenish discoloration. Fresh chicken has a clean, barely noticeable smell – avoid packages with any sour or ammonia-like odors.
Check the sell-by date and choose packages with the furthest date if you’re not cooking immediately. Don’t hesitate to ask your butcher for recommendations or to inspect the thighs before purchasing, especially at specialty meat markets where they can often provide superior quality cuts.
Substitutions
While bone-in, skin-on thighs work best, you can adapt this recipe for other cuts with some modifications. Boneless thighs require about 5 minutes less cooking time and benefit from being pounded to even thickness. Chicken drumsticks work wonderfully with the same technique but need an additional 10-15 minutes in the oven.
For those avoiding dark meat, bone-in chicken breasts can substitute, though they require more careful temperature monitoring to prevent drying out. Increase the initial searing time by 2-3 minutes per side and check for doneness at 160°F internal temperature.
Ingredients & Prep
Success with Garlic Chicken Thighs starts with proper preparation and quality ingredients that enhance the natural flavors.

Chicken Prep Essentials
Begin by patting each thigh completely dry with paper towels – this crucial step ensures crispy skin by removing surface moisture that causes steaming. Trim any excess fat or loose skin, but leave most of the skin intact for flavor and protection during cooking.
Season the thighs generously with salt at least 30 minutes before cooking, allowing time for the seasoning to penetrate the meat. This dry-brining technique enhances both flavor and texture. Before cooking, let the seasoned thighs sit at room temperature for 15-20 minutes to ensure even cooking throughout.
Marinades & Seasonings
The garlic mixture combines minced fresh garlic with complementary herbs and spices that penetrate the meat during cooking. Use 6-8 cloves of fresh garlic, minced finely, mixed with olive oil, dried thyme, rosemary, paprika, salt, and freshly ground black pepper.
For deeper flavor, prepare this seasoning blend 2-4 hours ahead and let the thighs marinate in the refrigerator. The garlic becomes more mellow and aromatic, while the herbs infuse throughout the meat. Always bring marinated chicken to room temperature before cooking for the most even results.
Pantry Staples
This recipe relies on simple, high-quality ingredients you likely have on hand. Use extra-virgin olive oil for its flavor and high smoke point, kosher salt for its clean taste and easy dissolving properties, and freshly ground black pepper for maximum potency.
Keep dried herbs like thyme and rosemary in airtight containers away from light and heat – they should retain their color and aroma for up to two years. Sweet paprika adds beautiful color and mild warmth, while fresh garlic provides the signature flavor that makes these Garlic Chicken Thighs irresistible.
Step-by-Step Cooking Instructions
Follow these detailed steps for perfectly cooked Garlic Chicken Thighs with crispy skin and juicy meat every time.
Pre-Cooking Prep
Remove chicken thighs from refrigerator 20 minutes before cooking and pat completely dry with paper towels. This temperature adjustment prevents the meat from seizing up when it hits the hot pan, ensuring more even cooking throughout.
Preheat your oven to 425°F and position the rack in the center. Heat 2 tablespoons of olive oil in a large, oven-safe skillet over medium-high heat until it shimmers but doesn’t smoke. Cast iron or stainless steel skillets work best for achieving optimal browning.
Cooking Method
Place thighs skin-side down in the hot skillet, being careful not to overcrowd – work in batches if necessary. Listen for an immediate sizzling sound, which indicates proper temperature. Sear undisturbed for 4-5 minutes until the skin releases easily and turns golden brown.
Flip the thighs and sear the other side for 3-4 minutes. Add the garlic mixture around (not on top of) the chicken, allowing it to sizzle and become fragrant. Transfer the entire skillet to the preheated oven and roast for 20-25 minutes.
Doneness Check
Check internal temperature using an instant-read thermometer inserted into the thickest part of the thigh, avoiding bone contact. Garlic Chicken Thighs are perfectly done at 165°F internal temperature – the juices should run clear, and the meat should feel firm but not hard when pressed gently.
If thighs haven’t reached temperature after 25 minutes, continue cooking in 5-minute intervals, checking temperature each time. Overcooking will result in dry meat, so monitor carefully during the final stages.
Resting
Remove the skillet from oven and let thighs rest for 5-10 minutes before serving. This resting period allows juices to redistribute throughout the meat, ensuring each bite is moist and flavorful. Use this time to prepare side dishes or make a quick pan sauce with the rendered drippings.
Pro Tips for Perfect Chicken
Master these professional techniques to elevate your Garlic Chicken Thighs from good to absolutely exceptional.
Avoiding Tough or Dry Chicken
Never skip the initial searing step – this creates the foundation for crispy skin and locks in moisture. Resist the urge to move or flip the chicken before it naturally releases from the pan, which typically takes 4-5 minutes per side.
Maintain consistent oven temperature throughout cooking and avoid opening the door unnecessarily, which causes temperature fluctuations. If your thighs are browning too quickly, tent loosely with foil during the final 10 minutes of cooking.
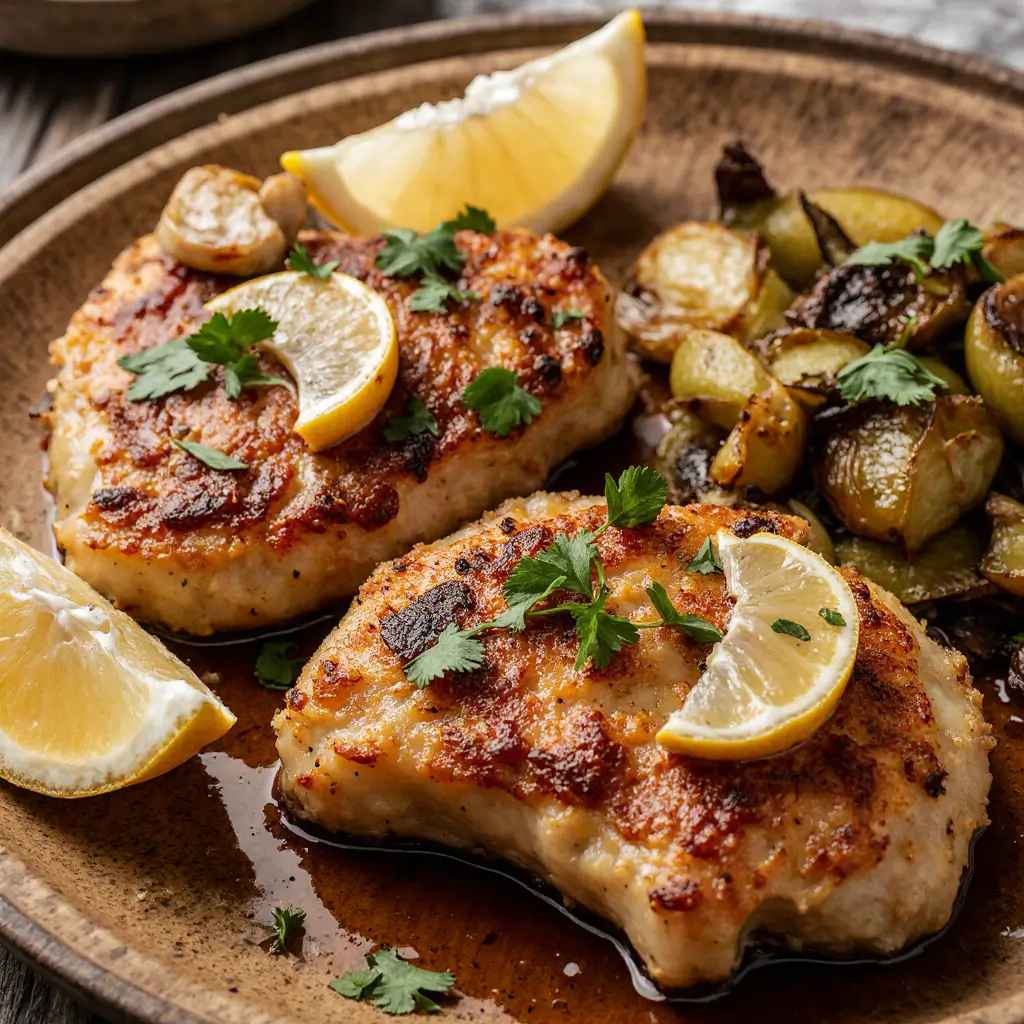
Tool Recommendations
Invest in an instant-read digital thermometer for foolproof temperature checking – this single tool eliminates guesswork and prevents overcooking. A heavy-bottomed, oven-safe skillet distributes heat evenly and prevents hot spots that can burn your garlic mixture.
Kitchen tongs with silicone tips protect your cookware while providing secure grip for flipping chicken safely. A splatter screen reduces stovetop mess during the initial searing phase, especially helpful when cooking multiple batches.
Storage & Reheating
Store leftover Garlic Chicken Thighs in the refrigerator for up to 4 days in airtight containers. For best results, separate the meat from any accumulated juices and store separately to prevent sogginess.
Reheat gently in a 325°F oven for 10-15 minutes, covering with foil to prevent further browning. Avoid microwaving, which makes the skin rubbery and can dry out the meat. Properly stored cooked thighs freeze well for up to 3 months.
Flavor Variations
Transform your basic Garlic Chicken Thighs into exciting new meals with these delicious variations that cater to different tastes and dietary needs.
Spicy Twist
Add heat and complexity by incorporating 1-2 teaspoons of smoked paprika and a pinch of cayenne pepper to your garlic mixture. For bolder flavor, include 1 tablespoon of harissa paste or 2 minced chipotle peppers in adobo sauce, adjusting the quantity based on your heat tolerance.
Create a spicy honey glaze by mixing 3 tablespoons honey with 1 tablespoon sriracha and brushing over the thighs during the final 10 minutes of cooking. This creates a beautiful lacquered appearance with sweet-heat balance.
Keto & Paleo Options
This Garlic Chicken Thighs recipe naturally fits keto and paleo guidelines without modifications. Enhance the fat content by adding 2 tablespoons of grass-fed butter to the skillet during the final 5 minutes of cooking, creating a rich, herb-infused basting liquid.
Replace olive oil with avocado oil for higher smoke point and neutral flavor, or use rendered bacon fat for extra richness. Add fresh herbs like rosemary and thyme during the last few minutes of cooking for aromatic appeal without added carbohydrates.
Global Flavors
Transform your Garlic Chicken Thighs into Mediterranean-inspired cuisine by adding lemon zest, oregano, and Kalamata olives to the pan during the final 10 minutes. Finish with crumbled feta cheese and fresh parsley for authentic Greek flavors.
For Asian-inspired variations, marinate thighs in a mixture of soy sauce, fresh ginger, garlic, and sesame oil for 2-4 hours before cooking. Add sliced green onions and sesame seeds as garnish for restaurant-quality presentation.
Serving Suggestions
Complete your Garlic Chicken Thighs dinner with complementary sides and beverages that enhance the rich, savory flavors.
Pair these aromatic thighs with creamy mashed potatoes or buttery rice pilaf to soak up the delicious pan drippings. Roasted vegetables like Brussels sprouts, carrots, or asparagus add color and nutritional balance while their caramelized edges complement the garlic flavors beautifully.
For lighter options, serve over mixed greens with the pan drippings as a warm vinaigrette, or alongside quinoa salad with fresh herbs. Crusty bread allows everyone to enjoy every drop of the flavorful cooking liquid.
Wine pairings work wonderfully with these rich thighs – try a medium-bodied red like Pinot Noir or Côtes du Rhône, or a full-bodied white like Chardonnay or Viognier. Beer lovers should consider wheat beers, amber ales, or even a crisp pilsner to cut through the richness.
FAQs
Get answers to the most common questions about preparing perfect Garlic Chicken Thighs.
Can I use frozen chicken thighs? While fresh thighs produce the best results, you can use frozen ones with proper thawing. Thaw completely in the refrigerator for 24-48 hours, then pat dry thoroughly and bring to room temperature before cooking. Never cook from frozen, as this leads to uneven cooking.
How do I fix overcooked chicken? If your Garlic Chicken Thighs become dry, shred the meat and mix with the pan drippings plus a splash of chicken broth to restore moisture. Use this mixture for sandwiches, salads, or grain bowls where the added liquid won’t be noticeable.
Is this recipe safe during pregnancy? Yes, when cooked to the proper internal temperature of 165°F, this recipe is completely safe for pregnant women. Use a reliable thermometer to ensure doneness, and avoid any pink juices or undercooked areas near the bone.
Can I make this recipe ahead of time? You can season the thighs up to 24 hours in advance and store covered in the refrigerator. For best results, sear and finish cooking just before serving, though fully cooked thighs reheat well using the methods described in the storage section.
What if I don’t have an oven-safe skillet? Transfer the seared thighs to a baking dish after browning, scraping up any browned bits and garlic mixture from the original pan. Add this flavorful mixture to the baking dish and proceed with oven cooking as directed.
Conclusion
Fire up your kitchen and transform tonight’s dinner with these incredibly flavorful Garlic Chicken Thighs! This foolproof one-pan method delivers restaurant-quality results that will have your family requesting this recipe again and again. The combination of crispy skin, tender meat, and aromatic garlic creates a meal that’s both impressive and comfortingly familiar.
Join the thousands of home cooks who’ve made this their go-to weeknight dinner solution – the technique is simple enough for beginners yet delivers results that would make any chef proud. Once you master this basic method, you’ll find yourself experimenting with different seasonings and serving styles.
Ready to expand your chicken repertoire? Try our Honey Glazed Chicken Drumsticks or explore our collection of One-Pan Dinner Recipes for more easy, delicious meal solutions that minimize cleanup while maximizing flavor!



4 Comments
d3plqt
6cf99g
ze6f73
db8aka