


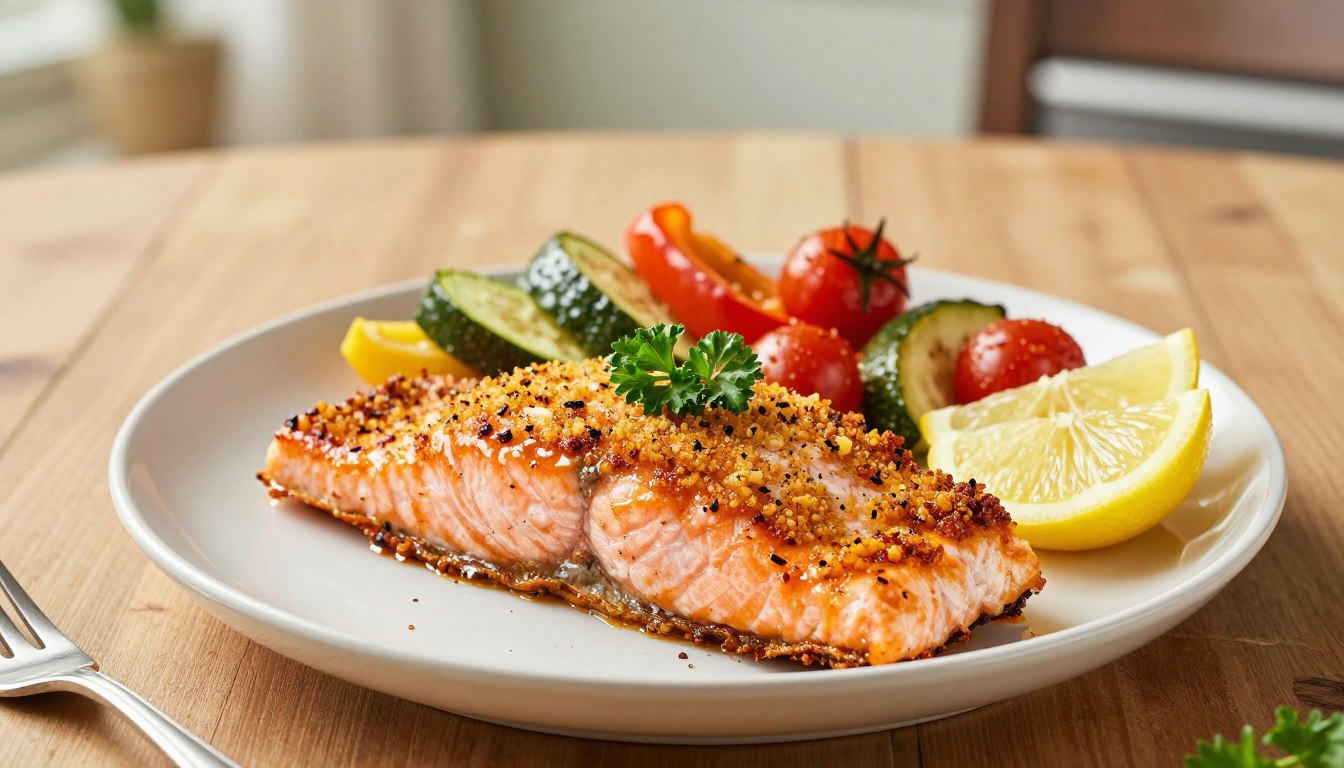
Do you ever stare into the fridge at 6 PM, feeling that familiar weeknight dread? You want something delicious and healthy, but you’re short on time and energy. We’ve all been there. What if you could break that cycle with one reliable, flavor-packed dish?
This method is a true game-changer for busy home cooks. It transforms a simple piece of fish into a crispy, perfectly cooked masterpiece. You use very little oil, yet achieve maximum taste. The vibrant, mouthwatering spices create a meal that feels special any night of the week.
The best part is the incredible speed. From start to finish, you can have a restaurant-quality dinner on your table in under 20 minutes. It’s that fast. This approach is also wonderfully nutritious. You get all the benefits of omega-3 fatty acids from the seafood, combined with wholesome ingredients.
This guide will walk you through every step for success. You’ll learn how to pick the best ingredients, get pro tips for perfect results, and find great serving ideas. Get ready to say goodbye to boring dinners. This easy, consistent method delivers delicious results every single time.
Table of Contents
Why You’ll Love This Cajun Salmon Recipe
Imagine a dinner that cooks itself while you relax, filling your kitchen with mouthwatering aromas. This approach is designed for real life, where convenience meets outstanding taste. You get a fantastic meal with minimal effort.
The preparation is wonderfully simple. You spend just a few active minutes coating your fish with spices and oil. Then, the air fryer takes over. It circulates hot air to cook everything evenly. This means no messy stovetop splatter and very little cleanup afterward.
You achieve an incredible texture every single time. The outside becomes delightfully crispy and coated in bold seasoning. Inside, the fillet stays tender, moist, and perfectly flaky. This contrast makes each bite exciting.
Speed is a major benefit. From gathering your ingredients to serving, the entire process takes about 20 minutes. It’s a reliable solution for busy nights. You can have a wholesome dinner on the table faster than ordering takeout.
This dish is also packed with nutrition. The main seafood is an excellent source of high-quality protein and heart-healthy omega-3 fats. You can easily pair it with your favorite vegetables for a complete, balanced plate.
The flavor profile is robust and completely adjustable. The spice blend delivers a smoky, slightly spicy kick. You control the heat level to match your preference. It’s a way to add excitement to your routine without complexity.
Versatility is another strong point. This recipe works beautifully with whole fillets or pre-cut bites. It adapts to various dietary needs and pairs with countless sides. Whether you’re cooking for one or a family, it fits the plan.
Finally, there’s great satisfaction in creating such an impressive meal with a modern appliance. The air fryer makes consistent, excellent results accessible to everyone. You’ll feel like a pro chef with very little work.
| Feature | This Recipe | Traditional Oven Baking | Pan Frying |
|---|---|---|---|
| Hands-On Time | 5 minutes | 10 minutes | 10-15 minutes |
| Total Cooking Time | 10-12 minutes | 20-25 minutes | 8-10 minutes |
| Oil Used | 1 tablespoon or less | 1-2 tablespoons | 3-4 tablespoons |
| Cleanup Effort | Minimal (basket only) | Moderate (sheet pan) | High (splattered stovetop) |
| Texture Result | Crispy exterior, moist interior | Evenly cooked, less crisp | Crispy skin, risk of uneven cooking |
What You Need: Ingredients Breakdown
Let’s break down exactly what you’ll need to bring this vibrant meal to life. Quality components ensure your final dish is packed with flavor and has the perfect texture. We’ll look at each element in detail.
Choosing the Right Salmon
Start with high-quality salmon fillets. You can use fresh or frozen. Thaw frozen fish completely in the fridge first.
Consider thickness. Fillets about 1 to 1.5 inches thick cook most evenly. This prevents the outside from drying out before the inside is done.
You can buy skin-on or skinless cuts. Skin-on gives a protective layer and can become very crispy. Skinless is easier to eat and coats more evenly with spices.
Portion size matters. For whole fillets, aim for 6-8 ounces per person. For bites, cut into uniform 1.5-inch cubes. This guarantees everything finishes cooking at the same time.
| Feature | Skin-On Fillets | Skinless Fillets |
|---|---|---|
| Crispiness | Skin gets very crispy; flesh stays moist. | Exterior seasoning forms a nice crust. |
| Ease of Eating | Skin can be eaten or removed after cooking. | Ready to eat immediately, no skin to deal with. |
| Cooking Time | May need 1-2 extra minutes for skin to crisp. | Cooks slightly faster as heat penetrates directly. |
| Best For | Those who enjoy crispy texture and extra flavor. | Quick meals and bites where even coating is key. |
The Cajun Seasoning
The cajun seasoning is the flavor star. A good blend is smoky, savory, and has a little heat. You can use a store-bought mix or make your own.
Popular store brands like McCormick’s work well. Check the label for salt content. Some blends are very salty, so you may need to adjust added salt.
For a homemade spice blend, combine these in a small bowl:
- 2 tablespoons paprika (smoked or sweet)
- 1 teaspoon each of garlic powder, onion powder, dried oregano, and dried thyme
- 1/2 to 1 teaspoon cayenne pepper (adjust for heat)
- 1 teaspoon black pepper
- 1 teaspoon salt (optional if your blend already contains it)
Mixing your own is a great way to control sodium and spice level. A pinch of sugar can balance the heat.
Oil and Aromatics
A small amount of oil is essential. It helps the cajun seasoning stick to the fish. It also promotes that desirable crispy finish.
Use a high-heat oil like avocado or olive oil. About one tablespoon is enough for a pound of fish. Toss the salmon fillets in the oil before adding the dry spices.
For extra flavor, consider optional additions. Fresh lemon juice adds brightness. Minced garlic provides a pungent kick. Red pepper flakes increase heat.
You can cook vegetables alongside your main dish. Try sliced zucchini and onion. Toss them with a bit of olive oil, salt, and pepper. They’ll roast beautifully in the same appliance.
These simple ingredients come together for a spectacular meal. Each plays a specific role in creating the final taste and texture.
If you enjoy simple homemade comfort meals like this Cajun Air Fryer Salmon , you might also love these easy recipes:
Essential Kitchen Tools for Air Frying
Success in the kitchen often comes down to using the proper equipment for the job at hand. The right gear streamlines the process and guarantees excellent results. This holds especially true for modern cooking methods.
Your main appliance is, of course, the air fryer. This unit uses rapid air circulation technology. A powerful fan moves superheated air around the food at high speed. This cooks items quickly and creates a delightfully crispy exterior with very little oil.
Preheating this appliance is a recommended step for consistent outcomes. It ensures the cooking environment is immediately at the right temperature when you add your food. This helps achieve that perfect sear from the very first minute.
Inside the unit, the air fryer basket is the workhorse. It typically has a perforated bottom. These holes are crucial for allowing hot air to circulate completely around your ingredients. Never overcrowd this container.
Leaving space between pieces is a non-negotiable rule. Crowding blocks airflow and leads to steaming instead of crisping. For easy cleanup, consider lining the fryer basket.
You can use parchment paper liners designed for these appliances. These perforated rounds prevent sticking without blocking air vents. They make post-meal cleanup absolutely effortless.
Handling hot components safely is important. A good pair of kitchen tongs or a silicone spatula is perfect for this. Use them to arrange food in the basket and to remove it when done.
For perfect doneness, a digital meat thermometer is invaluable. Insert it into the thickest part of your protein to check the internal temperature. This takes the guesswork out of cooking.
Before anything goes into the appliance, you need a simple mixing bowl. This is where you’ll toss your main ingredient and vegetables with oil and seasoning. A large bowl gives you room to coat everything evenly.
An optional but handy tool is a small spray bottle filled with oil. A light mist can coat the basket if you choose not to use a parchment liner. This provides just enough fat to prevent sticking.
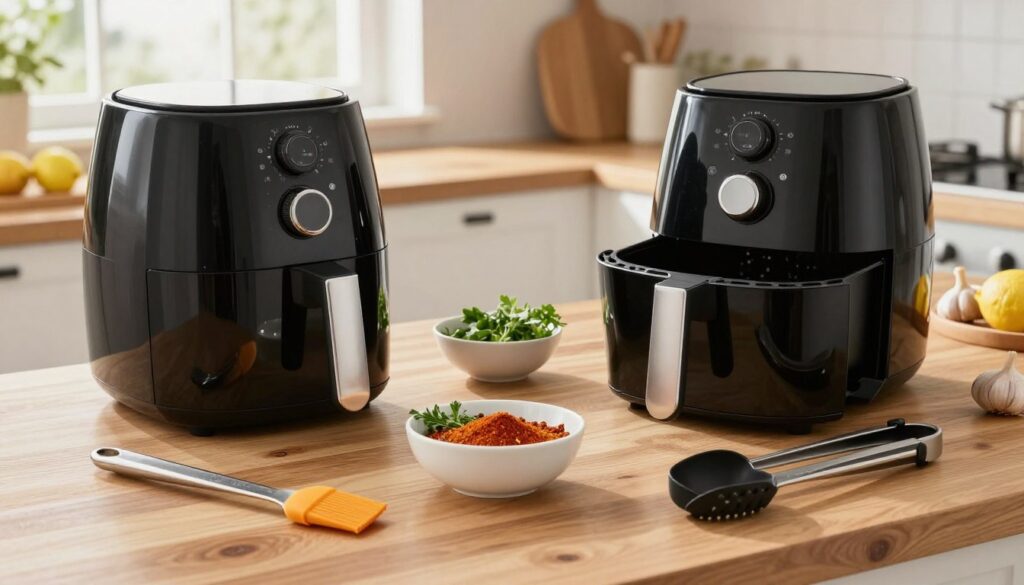
| Tool | Primary Purpose | Pro Tip for Best Use |
|---|---|---|
| Air Fryer Unit | Circulates hot air to cook food quickly and crisply. | Always preheat for 3-5 minutes to ensure consistent, immediate cooking heat. |
| Perforated Basket | Holds food while allowing maximum hot air circulation from all sides. | Arrange items in a single layer with space between them to prevent steaming. |
| Parchment Paper Liners | Prevents food from sticking to the basket for effortless cleanup. | Use pre-cut, perforated rounds designed for air fryers to maintain proper airflow. |
| Digital Meat Thermometer | Provides an accurate read of internal temperature for perfect doneness. | Insert the probe into the thickest part of the food, avoiding the cooking surface. |
| Kitchen Tongs | Allows for safe handling and arranging of hot food in the basket. | Opt for silicone-tipped tongs to avoid scratching non-stick basket coatings. |
| Mixing Bowl | Used to evenly coat ingredients with oil and seasoning before cooking. | Choose a bowl large enough to toss contents without spilling. |
| Oil Spray Bottle (Optional) | Applies a thin, even layer of oil to the basket to prevent sticking. | Fill with a high-heat oil like avocado oil for best results. |
Gathering these items before you start is the best way to ensure a smooth cooking session. With your tools ready, you can focus entirely on creating a fantastic meal.
Step-by-Step Prep: Getting Your Salmon Ready
The secret to a flawless dish lies in the preparation steps you take before the cooking even begins. This phase is all about setting up your main ingredient for success. A little attention here ensures maximum flavor and perfect texture later.
We’ll walk through three key tasks. First, you’ll remove excess moisture. Next, you’ll decide on the cut of your fish. Finally, you’ll create the bold spice coating. Each step is simple but makes a big difference.
Patting the Salmon Dry
Always start with this critical move. Use clean paper towels to gently press the surface of your fillets. You want to absorb all visible moisture.
This step is non-negotiable for a crispy finish. Surface water creates steam during cooking. That steam prevents the exterior from getting nicely browned.
Dry fillets allow the oil and spices to cling directly to the flesh. This creates a delicious, seasoned crust. Be thorough, especially if your fish was previously frozen.
Cubing the Salmon (For Bites)
Cutting your fish into pieces is great for appetizers or easy serving. Use a sharp knife on a stable cutting board. Aim for uniform cubes, about 1.5 inches on each side.
Consistent size is the key to even cooking. Smaller pieces will cook faster and could dry out. Larger pieces might be underdone in the center.
Once cubed, pat these pieces dry just like whole fillets. This ensures every bite gets equally crispy. Now your fish is ready for its flavor coating.
Mixing the Cajun Seasoning Blend
This is where the signature taste comes alive. You have two excellent options: a store-bought mix or a homemade version. Both work wonderfully.
If you choose a pre-made blend, check the label for salt content. Some are quite salty, so you may not need to add extra. Give the jar a good shake before using.
Making your own blend lets you control the heat and flavor profile. It’s simple to mix dried spices in a small bowl. A basic homemade cajun seasoning includes paprika, garlic powder, onion powder, oregano, thyme, cayenne, black pepper, and salt.
| Feature | Homemade Blend | Store-Bought Blend |
|---|---|---|
| Flavor Control | You adjust each spice level, heat, and saltiness. | Fixed flavor profile set by the manufacturer. |
| Convenience | Requires 5 minutes to measure and mix spices. | Instant; just open the container and use. |
| Cost | Often cheaper if you have a well-stocked spice cabinet. | Slightly higher per-use cost but no upfront investment. |
| Freshness | Maximum potency since spices are mixed fresh. | Can lose potency over time once opened. |
| Best For | Cookers who love to customize and avoid additives. | Anyone seeking ultimate speed and simplicity. |
Now, bring everything together. Place your dry fish pieces or whole fillets in a large mixing bowl. Drizzle with about one tablespoon of a high-heat oil, like avocado or olive oil.
Toss gently to coat each piece lightly and evenly. This thin layer of fat helps the spices stick and promotes browning.
Sprinkle your chosen cajun seasoning over the oiled fish. For extra kick, add a pinch of red pepper flakes or a squeeze of lemon juice. Toss again until every piece is fully and uniformly coated in the vibrant spices.
You can prepare the seasoning mix in advance for future meals. Store it in an airtight container. Adjust the quantity of cayenne for more or less heat based on your taste.
Your seasoned fish is now perfectly prepped. It’s ready for the next stage: cooking in your preheated appliance.
How to Make Cajun Air Fryer Salmon
You’re ready to move from seasoning to sizzling with a few simple, crucial steps. This part of the process turns your prepared fish into a hot, crispy dinner. Follow these instructions for a foolproof meal every time.
Preheating Your Air Fryer
Begin by turning on your appliance. Set the temperature to 400°F (200°C). Let it run empty for three to five minutes.
This step is vital for consistent results. A hot cooking chamber gives an immediate sear. It locks in moisture and helps form a great crust.
Arranging the Salmon in the Basket
Take your seasoned fish pieces. Carefully place them into the preheated basket. Ensure they sit in a single layer.
Leave space between each piece. Do not let them touch or overlap. This space allows the hot air to circulate freely.
Proper arrangement prevents steaming. It ensures every side gets crispy and browned.
Best Amazon Picks:
Cooking Time and Temperature
Cook at 400°F. This high heat is ideal. It creates a crisp exterior while keeping the interior moist.
Timing depends on the size of your fish. For uniform cubes or bites, cook for five to six minutes. For whole portions, plan for ten to twelve minutes.
Consider flipping halfway through. This is especially helpful for skin-on cuts. It helps crisp both sides evenly.
Start checking a minute or two before the suggested time. Models can vary slightly. Your food is done when the spices are fragrant and the surface is browned.
| Parameter | Salmon Bites/Cubes | Whole Fillets |
|---|---|---|
| Temperature | 400°F (200°C) | 400°F (200°C) |
| Cooking Time | 5-6 minutes | 10-12 minutes |
| To Flip or Not? | Not necessary for even cubes. | Recommended, especially for skin-on fillets. |
| Doneness Check Time | Check at 4 minutes. | Check at 9 minutes. |
| Key Visual Cue | Spices are toasted, edges are crisp. | Surface is nicely browned, spices fragrant. |
| Note on Skin | N/A for skinless bites. | Skin becomes very crispy if flipped. |
How to Know When Your Salmon is Perfectly Cooked
You can cook with confidence by learning two straightforward methods for checking doneness. Getting it right ensures a moist, flaky result every single time.
Perfectly cooked fish has clear visual and textural cues. The flesh will be opaque throughout, not translucent. It should feel firm to a gentle press but still yield slightly, indicating retained moisture.
Watch for these key signs:
- The color changes from deep orange or pink to a lighter, solid hue.
- The surface is nicely browned where the spices have toasted.
- The texture is springy, not mushy or hard.
The Flake Test
This classic technique uses a simple fork. Gently insert the tines into the thickest part of your fillet. Twist the fork slightly.
If the flesh separates easily into large, clean flakes, it is done. The pieces should look moist and hold together loosely. This is a reliable, tool-free way to check.
Avoid poking the fish too many times. This can cause precious juices to escape. One gentle test in the center is enough.
Checking Internal Temperature
For absolute precision, use an instant-read digital thermometer. This is the most accurate method. Insert the probe into the center of the thickest section.
The USDA recommends a safe internal temperature of 145°F (63°C). Many chefs prefer to remove it from heat at 135-140°F. The residual heat will raise the temperature a few more degrees as it rests.
This results in a juicier, more tender finish. Checking a minute or two before the expected finish time is wise. Overcooking leads to dry, tough results.
| Method | How To | Ideal Result | Best For |
|---|---|---|---|
| The Flake Test | Gently twist a fork in the thickest part. | Flesh separates easily into large, moist flakes. | Quick checks, no tools needed. |
| Internal Temperature | Use a digital thermometer in the center. | Reads 135-140°F (57-60°C) when removed. | Precision, guaranteed perfect doneness. |
For pre-cut bites, checking one of the larger cubes tells you about the whole batch. The appliance’s consistent heat makes this process very reliable.
With these techniques, your air fryer salmon will turn out perfectly juicy. You’ll never have to guess about cooking times again.
Pro Tips for the Best Air Fryer Salmon
Mastering a few expert techniques can elevate your results from good to exceptional. These insights help you avoid common pitfalls. They ensure a perfect meal with minimal effort every time.
Small adjustments in your routine make a big difference. Focus on preparation and appliance management. The payoff is a consistently crispy, flavorful dish.
Don’t Skip the Preheating Step
Always let your appliance heat up first. Set it to 400°F and run it empty for three to five minutes. This creates a hot, consistent cooking environment.
A preheated chamber gives an immediate sear. It locks in juices from the moment you place salmon inside. This step is crucial for that desirable crust.
Some recipes for small bites suggest skipping this. For whole fillets, preheating is non-negotiable. It guarantees even, predictable cooking from edge to center.
Use Parchment for Easy Cleanup
Line your basket with a perforated parchment round. These are made specifically for this way of cooking. The holes maintain proper airflow.
This paper liner prevents the seasoned fish from sticking. It also protects the non-stick coating of your basket. Cleanup becomes as simple as tossing the liner.
If you don’t have a liner, a light spray of oil on the basket works. Use a high-heat spray for best results. The goal is to create a non-stick surface.
Avoid Overcrowding the Basket
This is the cardinal rule for success. Arrange pieces in a single layer with space between them. They should not touch or overlap.
Crowding blocks the circulation of hot air. Food will steam instead of becoming crisp. Make sure you leave enough room.
If you have a large batch, cook in two rounds. It’s better to wait a few extra minutes. You will be rewarded with superior texture.
Here are more essential strategies for a flawless outcome:
- Pat Dry Thoroughly: Remove all surface moisture with paper towels. This is the single best way to achieve a maximally crispy exterior.
- Lightly Oil the Top: A quick spray over the seasoned fish helps the spices toast. It prevents them from burning or tasting dusty.
- Technique for Skin-On: Start with the skin side down in the basket. For ultra-crispy skin, consider flipping it halfway through the cook time.
- Watch the Final Minutes: Appliances can vary in power. Keep a close eye during the last two minutes to prevent overcooking.
| Tip | Action | Key Benefit |
|---|---|---|
| Preheat | Run the empty appliance at 400°F for 3-5 min. | Ensures immediate sear and consistent cooking temperature. |
| Use a Liner | Place a perforated parchment round in the basket. | Prevents sticking and makes cleanup effortless. |
| Avoid Crowding | Arrange in a single layer with space between pieces. | Promotes crispiness by allowing full air circulation. |
| Pat Dry | Blot fillets thoroughly with paper towels before seasoning. | Removes steam-creating moisture for a crispier crust. |
| Oil the Top | Lightly spray seasoned fish with oil before cooking. | Helps spices brown nicely without burning. |
| Manage Skin | Start skin-side down; flip for extra crispiness. | Transforms the skin into a delicious, crispy component. |
| Monitor Closely | Check progress during the final minutes of cooking. | Prevents overcooking, as appliances and fillet sizes vary. |
Following these guidelines takes the guesswork out of the process. Make sure you integrate them into your routine. You will notice a major improvement in quality.
Your appliance does most of the work. These pro tips make sure it performs at its best. The result is a reliably fantastic meal.
Troubleshooting Common Air Fryer Salmon Issues
Let’s tackle the typical questions and issues that come up to ensure your dish turns out perfectly. Even the best methods can have small challenges. Knowing how to solve them makes you a more confident cook.
This guide covers the most frequent concerns. You’ll learn why problems happen and get simple fixes. Your next meal will be juicy, flavorful, and cooked just right.
Why Is My Salmon Dry?
Dry, tough fish usually means it was cooked too long. Overcooking squeezes out the natural juices. The result is a less enjoyable texture.
There are a few easy solutions. First, reduce the cook time by a minute or two. Start checking for doneness earlier than the recipe suggests.
Using a digital thermometer is the best way to prevent this. Pull your fillets out when the internal temperature reaches 135-140°F. They will continue to cook a bit from residual heat.
Also, make sure you use enough oil. A light coating helps seal in moisture. It creates a barrier against the intense direct heat.
What Is the White Stuff on My Cooked Salmon?
That white, creamy substance is called albumin. It’s a harmless protein that coagulates during the cooking process. Seeing it is completely normal.
Albumin seeps out more if the fish has surface moisture or is overcooked. Patting your fillets very dry before seasoning is the best prevention.
You can eat it safely, as it doesn’t affect flavor. If you prefer, gently wipe it off with a paper towel after cooking. It’s just a visual quirk, not a sign of something wrong.
How to Get Crispy Skin
For perfectly crispy skin, start with a dry surface. Pat the skin side thoroughly with paper towels. Any moisture will steam and make it chewy.
Place the fillet skin-side down in the basket. This puts it in direct contact with the hot air. Cook at a high temperature, like 400°F.
For extra crispiness, flip the piece halfway through the time. This exposes both sides of the skin to intense heat. You’ll get a shatteringly crisp finish.
Other common issues have straightforward fixes too. For uneven cooking, cut your fish into uniform sizes. Shake the basket or flip pieces halfway through.
If your seasoning isn’t sticking, you likely skipped the drying step. Moisture repels spices. Always pat dry, then use oil as a glue for the seasoning.
You can cook directly from frozen in a pinch. Just add a few extra minutes to the cook time. Pat off any ice crystals first for better results.
| Issue | Likely Cause | Simple Solution |
|---|---|---|
| Dry, Tough Texture | Overcooking; insufficient oil. | Reduce time; use a thermometer; ensure light oil coating. |
| White Protein (Albumin) | Natural protein coagulation; excess surface moisture. | Pat fillets completely dry before cooking; it’s safe to eat. |
| Soggy or Chewy Skin | Skin not dried; not in direct heat. | Pat skin dry; cook skin-side down at high heat; consider flipping. |
| Uneven Cooking | Pieces are different sizes; overcrowded basket. | Cut into uniform cubes; cook in a single layer with space. |
| Seasoning Falls Off | Fish surface is wet; no oil binder. | Dry fillets thoroughly before adding oil and spices. |
| Long Cook Time from Frozen | Ice crystals insulate the fish. | Add a few minutes; pat off excess ice before cooking. |
With these tips, you can solve any small problem quickly. Your air fryer salmon will be delicious every single time. Happy cooking!
Delicious Side Dishes to Serve with Your Salmon
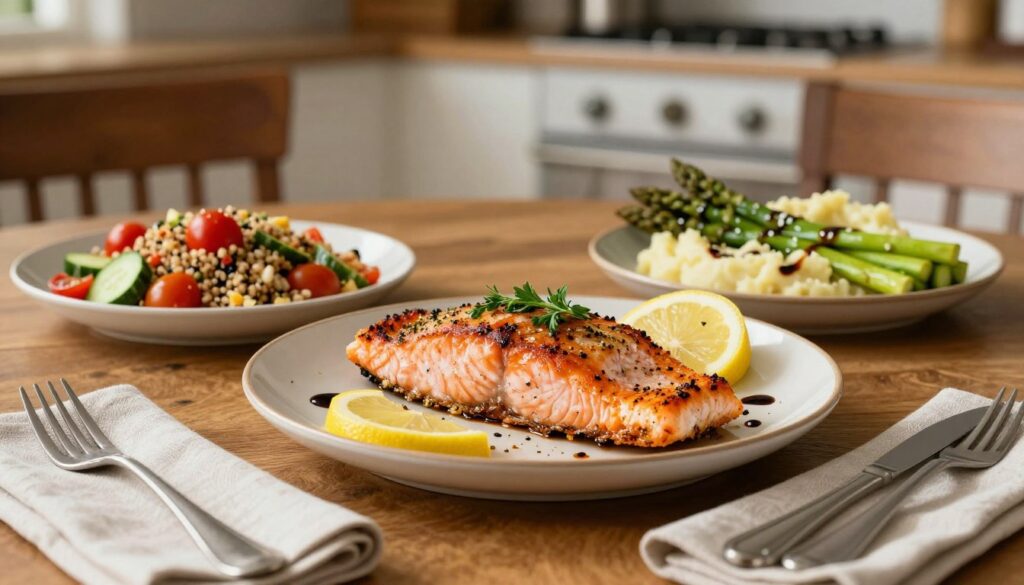
Your culinary creation deserves companions that match its vibrancy and make the whole experience delightful. The right accompaniments elevate your main dish into a complete, satisfying meal.
Think about balance. You want sides that complement the bold spice and rich flavor of your seafood. A great plate has texture, color, and taste harmony.
You can prepare many accompaniments using the same appliance. This way you save time and energy. It streamlines your cooking process beautifully.
Quick Air Fryer Vegetables
Your countertop cooker is perfect for roasting veggies. They come out tender-crisp and full of natural sweetness.
Toss your choices with a little oil, salt, and pepper. Cook them before or after your main protein. Just keep the temperature at 400°F.
Excellent options include:
- Asparagus spears: They cook in about 6-8 minutes.
- Broccoli or cauliflower florets: These get nicely charred edges.
- Zucchini or yellow squash slices: A quick roast enhances their mild taste.
- Sweet potato fries: A hearty alternative to traditional oven fries.
For extra garlic goodness, sprinkle minced cloves over the veggies before cooking. The heat mellows its pungency.
Classic Southern Sides
These recipes pair wonderfully with bold, smoky notes. They bring comfort and heartiness to your table.
Consider a creamy potato salad. Use a tangy mustard or dill dressing. It cools the palate from any heat.
Fresh corn and bean succotash is another winner. It’s colorful, nutritious, and easy to make. The natural sugar in the corn adds sweetness.
Don’t forget a slice of warm cornbread. Its slight sweetness balances savory spices perfectly. You can bake it in the oven while your main dish cooks.
Cheesy grits are a luxurious option. They create a creamy bed for your fillets. It’s a truly satisfying combination.
Light and Fresh Salads
A crisp salad provides a refreshing contrast. It cleanses the palate and adds vibrant color to your plate.
Keep it simple with mixed greens and a lemon vinaigrette. The acidity cuts through richness beautifully.
Tangy coleslaw made with cabbage and carrot is a classic. A vinegar-based dressing keeps it light. Avoid heavy mayo if you prefer.
A cucumber and tomato salad with red onion is another great choice. Add fresh herbs like dill or parsley. It’s hydrating and flavorful.
You can place a small mound of salad right on top of your fish. This adds a fresh crunch to every bite.
For a more filling meal, include hearty carbohydrates. Basmati rice or creamy mashed potatoes work well. They soak up any delicious juices.
If you’re watching carbs, try cauliflower rice. Sauté it quickly in a pan. Mashed cauliflower is another excellent low-starch substitute.
Finish your dish with a simple sauce. A pat of garlic-herb butter melts deliciously over the hot fillets. A squeeze of fresh lemon juice always brightens flavor.
Remember to compose a balanced plate. Aim for protein, vegetables, and a carb or starch. Your seafood will shine with these perfect sides.
Storing, Reheating, and Freezing Leftovers
Proper storage and reheating techniques are key to enjoying your flavorful creation beyond the first serving. With a few simple steps, you can maintain safety and quality. This ensures no delicious bite goes to waste.
Handling extras correctly preserves texture and taste. Follow these clear instructions for best results. You’ll find it’s an easy way to plan meals ahead.
Proper Refrigeration
Begin by letting your cooked fish cool. Do this at room temperature for no more than one hour. This prevents bacterial growth.
Then, transfer the pieces to an airtight container. You can also use a plate tightly wrapped with plastic paper. Place it in the refrigerator promptly.
The safe shelf life for refrigerated cooked seafood is 3 to 4 days. Always label the container with the date. This helps you track time accurately.
For best quality, consume within three days. The vibrant spices will remain potent. The flesh stays moist when stored correctly.
Reheating for Best Texture
The goal is to restore crispiness without drying out the fish. Your countertop appliance is perfect for this job. Avoid the microwave, as it makes the texture rubbery.
Preheat your air fryer to around 380°F. This slightly lower temperature is ideal. It warms the interior gently while crisping the exterior.
Place the leftover portions in the basket in a single layer. Reheat for 1 to 3 minutes. Check frequently to prevent overcooking.
You can also use a conventional oven. Set it to 350°F and warm for 5-7 minutes. The result won’t be as crisp but is still good.
Here are key tips for successful reheating:
- Do not thaw frozen pieces directly in the microwave. This leads to uneven heating and sogginess.
- Spritz lightly with oil before reheating to help refresh the seasoned crust.
- Serve immediately after reheating for the best eating experience.
Freezing Guidelines
Freezing is excellent for longer-term storage. It allows you to enjoy your meal weeks later. Proper technique prevents freezer burn and texture loss.
First, ensure the cooked fillets are completely cool. Wrap each portion tightly in plastic wrap or aluminum foil. Then, place them in a freezer-safe bag.
Remove as much air as possible from the bag before sealing. This step is crucial for quality. Label the bag with the contents and current date.
Frozen cooked seafood is best used within 1 to 2 months for optimal quality. After that, it remains safe but may lose some moisture and flavor.
To thaw, move the bag to the refrigerator overnight. Slow thawing is the best way to preserve texture. Avoid thawing at room temperature.
Once thawed, reheat using your appliance as described above. Do not refreeze previously frozen cooked items. Plan your portions wisely.
| Method | Key Steps | Duration & Tips |
|---|---|---|
| Refrigeration | Cool within 1 hour → Airtight container → Label with date. | 3-4 days max. Keep on a middle shelf, not in the door. |
| Reheating | Preheat appliance to 380°F → Single layer → Heat 1-3 min. | Check at 1-minute intervals. Avoid the microwave for crisp results. |
| Freezing | Cool completely → Wrap tightly → Freezer bag, remove air → Label. | 1-2 months for best quality. Thaw in fridge overnight before reheating. |
These methods work for many different recipes. You can print this guide for easy reference. Integrating these practices saves time on busy nights.
Remember, a hot oven is a good alternative for reheating. Just adjust the minutes accordingly. Your future self will thank you for the prepared meal.
Related Recipes:
Conclusion
This flavorful method proves that a healthy, gourmet meal is within easy reach any evening. You get a delicious dish with minimal active time. Remember the core principles: pat your fish dry, use a bold spice blend, cook at high heat, and avoid crowding the basket.
This recipe adapts to your taste. Adjust the heat level and use whole fillets or pre-cut bites. The tips in this guide ensure your first attempt is a success. Pair your creation with suggested sides for a complete, satisfying plate.
We are confident this will become a reliable favorite. It’s a fantastic way to enjoy nutritious seafood. Feel free to print these instructions for easy reference. Share your results and explore other quick recipes!
FAQ
Can I use frozen fillets for this recipe?
Yes, you can, but for the best results, thaw them completely in the refrigerator first. Patting the fish very dry is even more crucial when starting from frozen to ensure proper browning and texture.
My spice blend is too spicy. How can I adjust it?
You can easily customize your seasoning mix. Reduce or omit the cayenne pepper. Adding a teaspoon of brown sugar or a pinch of smoked paprika can balance the heat with sweetness and depth.
How do I prevent the fish from sticking to the basket?
A> Lightly coating the basket with a high-heat oil like avocado or grapeseed oil helps. For guaranteed non-stick results, use a perforated parchment paper liner cut to fit your appliance’s basket.
What’s the best way to check if it’s done without a thermometer?
Use the “flake test.” Gently press a fork into the thickest part of the fillet and twist slightly. The flesh should separate easily into large, opaque flakes and appear moist, not translucent.
Can I prepare the seasoned fish ahead of time?
It’s best to cook it immediately after seasoning. Letting it sit for more than 15-20 minutes can draw too much moisture to the surface, which can steam the fish instead of allowing it to get a nice sear.
What are good side dishes to serve with this?
A> This dish pairs wonderfully with quick air-fried asparagus or zucchini, a fresh citrus salad, or classic sides like dirty rice or creamy coleslaw for a full Southern-inspired meal.
