Homemade cheesecakes recipe
There’s something magical about creating a dessert that feels like it belongs in a high-end bakery. Imagine slicing into a creamy, decadent treat that’s smooth, perfectly sweet, and utterly satisfying. That’s the joy of making your own masterpiece at home.
This dish is incredibly versatile. You can choose from a variety of crusts, like graham crackers or chocolate cookies, and top it with fresh raspberry sauce or tangy lemon curd. The possibilities are endless, making it perfect for any occasion.
Mastering the technique is key to achieving that crack-free, velvety texture. Many New Yorkers swear by this method, and with the right tools—like a springform pan and a water bath—you’ll get flawless results every time.
Table of Contents
Key Takeaways
- Create restaurant-quality desserts at home with ease.
- Enjoy a velvety texture and balanced sweetness.
- Experiment with different crusts and toppings for variety.
- Use proper techniques to avoid cracks and ensure smoothness.
- Essential tools include springform pans and water baths.
Introduction to Homemade Cheesecakes
From New York delis to iconic TV moments, cheesecake has a special place in culinary history. Remember the Friends episode where Rachel’s “stolen cheesecake” became a hilarious highlight? That’s the kind of love this dessert inspires.
Over 20 years of recipe refinement have gone into perfecting this dish. It’s not just about mixing cream cheese and sugar; it’s about achieving that velvety texture that makes every bite unforgettable. One 5-star reviewer said,
“This is the best I’ve ever had—it beats NYC restaurants!”
Cheesecake’s cultural significance is undeniable. New York-style versions are dense and rich, while others are light and creamy. The science behind the texture lies in the balance of ingredients and techniques. For example, using a water bath ensures even baking and prevents cracks.
Many home bakers fear cracking, but with the right steps, you can achieve professional results. Since 2018, this recipe has evolved to include improved techniques, making it easier than ever to create a flawless dessert. Whether you prefer a classic graham cracker crust or something more adventurous, the possibilities are endless.
- Explore the rich history of cheesecake from delis to pop culture.
- Learn the science behind creamy vs. dense textures.
- Overcome common fears like cracking with proven methods.
- Discover how this recipe has been perfected over the years.
Ingredients for the Perfect Cheesecake
The foundation of a flawless dessert lies in the quality of its ingredients. From the crust to the filling, each component plays a vital role in achieving that creamy, smooth texture. Let’s break down what you’ll need to create a masterpiece.
Graham Cracker Crust Ingredients
The crust is the base of your dessert, and it’s essential to get it right. Start with graham cracker crumbs, which provide a sweet, crumbly texture. Combine them with melted butter and a touch of sugar for the perfect balance. For non-US bakers, digestive biscuits (200g) are a great alternative.
Cheesecake Filling Ingredients
The filling is where the magic happens. Use 32 oz of full-fat brick cream cheese for richness and structure. Spreadable versions won’t give you the same results. Add 1 cup of granulated sugar for balanced sweetness and 2 tsp of lemon juice for a brightening touch. Don’t forget sour cream, vanilla extract, and eggs to complete the mix.
Here’s a quick reference table for the ingredients:
| Ingredient | Quantity |
|---|---|
| Graham cracker crumbs | 1 ½ cups |
| Melted butter | ⅓ cup |
| Sugar | ¼ cup |
| Cream cheese | 32 oz |
| Granulated sugar | 1 cup |
| Lemon juice | 2 tsp |
| Sour cream | 1 cup |
| Vanilla extract | 1 tsp |
| Eggs | 3 large |
Remember, using ingredients at room temperature ensures a smooth, lump-free filling. This simple step makes a big difference in the final texture. Now that you’ve gathered everything, you’re ready to move on to the next step: preparing the crust.
Preparing the Graham Cracker Crust
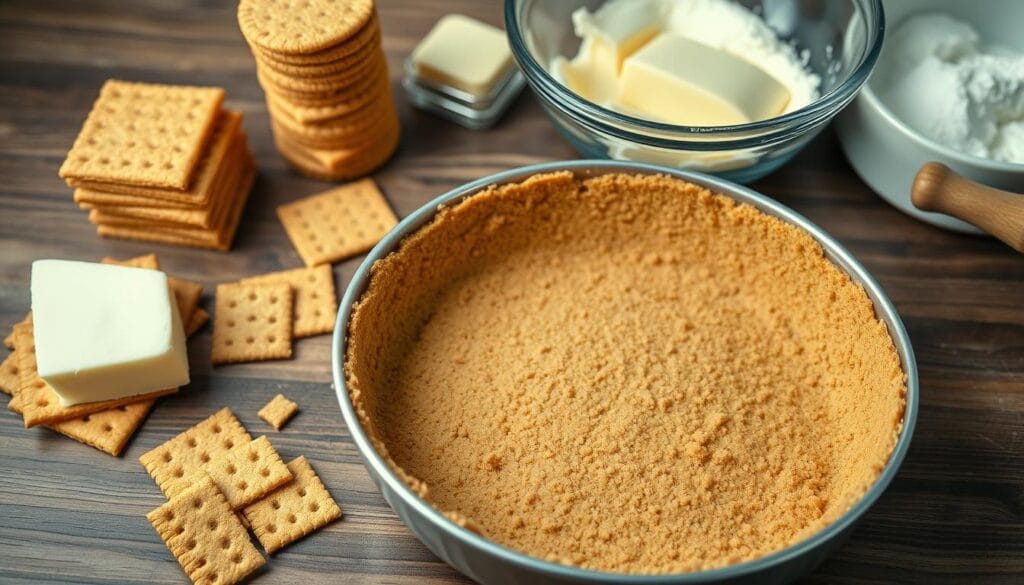
The crust is the foundation of any great dessert, and getting it right is essential. Start with graham cracker crumbs, which provide a sweet, crumbly texture. For a standard 9-inch springform pan, you’ll need about 180g of crumbs, which comes from 12 full sheets.
Combine the crumbs with 5 tablespoons of melted butter for structural integrity. Using slightly less butter than traditional recipes ensures a crispier crust. Mix until the crumbs are evenly coated and resemble wet sand.

Next, press the mixture into the pan. Use a measuring cup to pat it down firmly and evenly. This technique prevents air pockets and ensures a compact bottom. For the sides, press the crumbs about halfway up the pan to create a sturdy edge.
Pre-bake the crust at 350°F for 10 minutes. This step helps it hold its shape and prevents sogginess. If you’re using a water bath later, wrap the springform pan in aluminum foil or silicone wrap to protect it from leaks.
Here are some tips to troubleshoot common issues:
– For a crispier crust, reduce the butter slightly.
– Avoid soggy bottoms by pre-baking and using a water bath.
– Prevent crumbling edges by pressing the crumbs firmly.
– Compare aluminum foil and silicone wrap for water bath protection—both work well, but silicone is reusable.
Whether you use a food processor or crush the crackers manually, the key is consistency. Fine crumbs ensure an even texture, while larger pieces can create gaps. With these steps, your crust will be ready to support the creamy filling perfectly.
Making the Creamy Cheesecake Filling
Creating a creamy filling is the heart of any great dessert, and mastering the technique ensures perfection. Start by placing your cream cheese in a large bowl. Use a stand mixer with a paddle attachment to beat cream cheese on medium speed for about 2 minutes. This step ensures a smooth, lump-free base.
Next, gradually add sour cream and vanilla extract. Mix until just combined—overmixing can introduce air pockets, which may lead to cracks. For the eggs, add them one at a time, ensuring each is fully incorporated before adding the next. This sequential technique helps maintain the filling’s silken texture.
To check the consistency, perform the ribbon test. Lift the paddle and let the batter fall back into the bowl. If it forms a ribbon that holds its shape for a few seconds, it’s ready. This visual cue ensures you’ve achieved the perfect balance.
Here are some key tips to remember:
– Use room temperature ingredients to avoid air pockets.
– Avoid overmixing to maintain a smooth texture.
– The ribbon test is a reliable way to check consistency.
– Sour cream adds tanginess and helps stabilize the filling.
– Heavy cream can be substituted for a richer texture, but sour cream is preferred for its balance.
By following these steps, you’ll create a filling that’s creamy, smooth, and utterly delicious. Now, you’re ready to pour it into your prepared crust and move on to the baking process.
Baking Your Homemade Cheesecake
Achieving the perfect bake requires precision and the right techniques. The baking process is crucial for transforming your dessert into a masterpiece. By focusing on temperature, time, and methods like the water bath, you’ll ensure a smooth, crack-free finish.
Using a Water Bath for Even Baking
A water bath is essential for even heat distribution. It prevents cracks and ensures a creamy texture. To set it up, wrap your springform pan in aluminum foil to prevent leaks. Place it in a larger roasting pan and fill it with hot water until it reaches halfway up the sides of the springform pan.
This method mimics the thermodynamics of gradual heat transfer. It protects the edges from overcooking while allowing the center to set gently. For those without a roasting pan, alternative steam methods can work, but a water bath is the most reliable.
Baking Time and Temperature
Set your oven to 325°F for optimal results. Bake for 55 to 70 minutes, depending on your oven’s calibration. To test for doneness, gently jiggle the pan. The center should wobble slightly, while the edges remain firm.
Here’s a quick reference for baking:
| Step | Details |
|---|---|
| Oven Temperature | 325°F |
| Baking Time | 55-70 minutes |
| Doneness Test | Wobble center, firm edges |
If you’re at a high altitude, adjust the temperature and time slightly. Always calibrate your oven for accuracy. These steps ensure your dessert bakes evenly and sets perfectly.
Cooling and Setting the Cheesecake
The final step to a flawless dessert is patience during the cooling process. Proper cooling ensures a smooth, crack-free finish and the perfect texture. Start by turning off the oven and leaving the pan inside for 1 hour. This gradual reduction in temperature prevents thermal shock, which can cause cracks.

After the initial cooling, transfer the pan to the refrigerator for at least 4 hours. For best results, let it chill overnight. This extended time allows the protein matrix to fully set, giving your dessert its signature creamy texture.
To release the dessert from the pan, use the knife-edge technique. Run a thin knife around the edges, ensuring it’s completely loosened before removing the springform ring. This step prevents sticking and maintains the perfect shape.
Condensation can sometimes form on the surface during cooling. To avoid this, let the dessert come to room temperature before refrigerating. If condensation does occur, gently blot it with a paper towel.
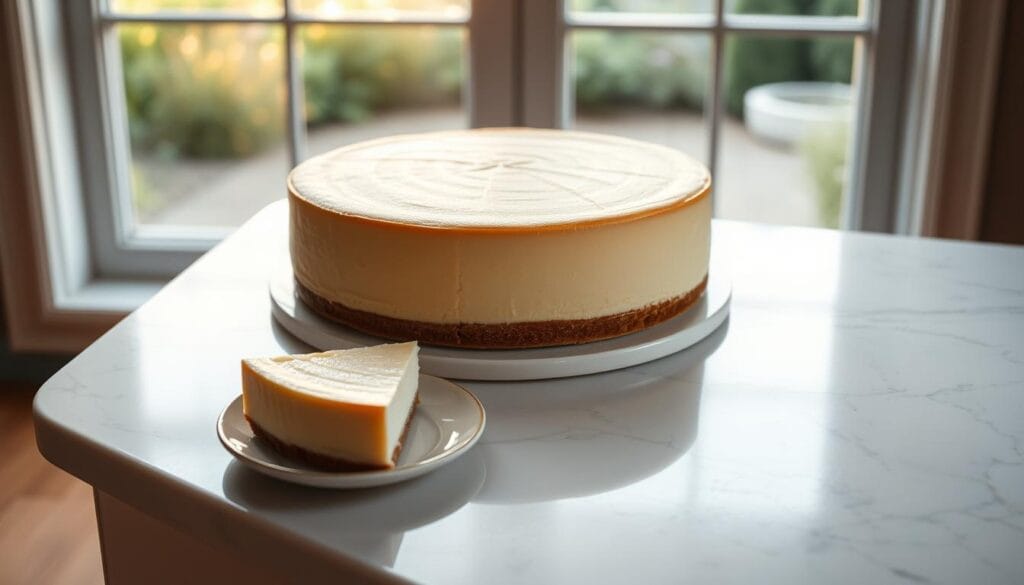
For event planning, this dessert is a great make-ahead option. Prepare it up to 2 days in advance and store it in the refrigerator. The flavors deepen over time, making it even more delicious. With these tips, you’ll achieve a professional-quality dessert every time.
Serving Your Homemade Cheesecake
The moment you slice into a perfectly chilled dessert is pure satisfaction. To achieve clean, professional slices, use the warm knife method. Dip a sharp knife in hot water, wipe it dry, and cut smoothly. Repeat this step for each slice to maintain precision.
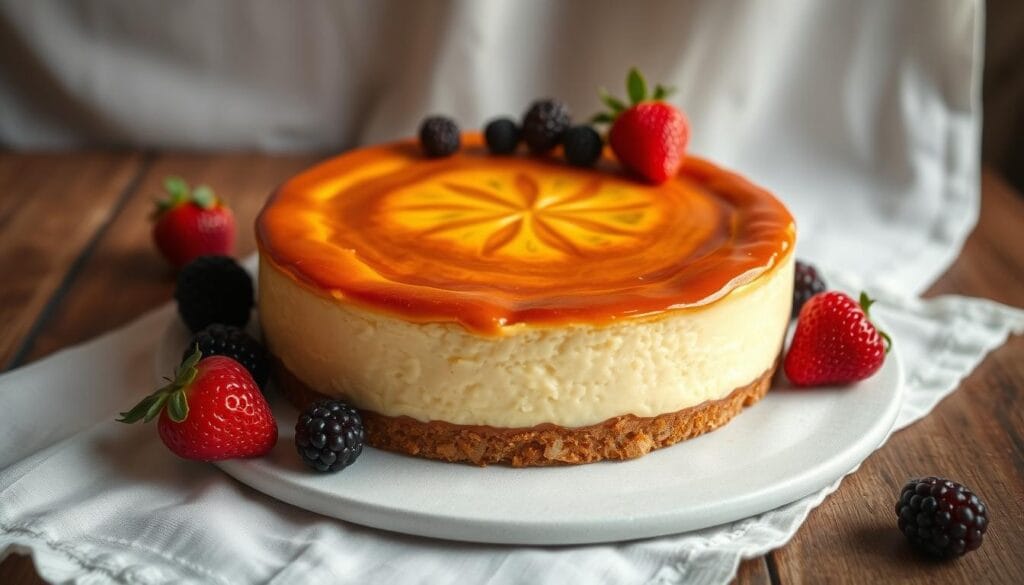
Pair your dessert with a tangy berry sauce for a balanced flavor. A raspberry or strawberry sauce complements the creaminess beautifully. The acidity of the berries cuts through the richness, creating a harmonious bite.
For a polished presentation, consider these plating techniques:
– Use a cake lifter to transfer slices to plates.
– Drizzle sauce in artistic patterns for visual appeal.
– Add fresh berries or mint leaves as garnishes.
– Experiment with edible flowers or citrus zest for a creative touch.
Temperature plays a crucial role in serving. Ideally, let the dessert chill in the refrigerator for at least 4 hours before serving. This ensures the cheese filling is firm and the graham crust remains crisp.
Portion sizing depends on your springform pan’s diameter. For a 9-inch pan, aim for 12 slices. Smaller pans yield fewer, thicker slices. Adjust according to your guests’ preferences.
Finally, don’t forget the finishing touches. A sprinkle of powdered sugar, a drizzle of caramel, or even a touch of gold leaf can elevate your dessert to a show-stopping centerpiece. With these tips, your serving game will be as impressive as your baking skills.
Tips for a Perfect Homemade Cheesecake
Achieving a smooth, crack-free finish is easier than you think with these tips. Whether you’re a beginner or a seasoned baker, these techniques will help you create a dessert that looks and tastes professional.
Avoiding Cracks in Your Dessert
Cracks can ruin the appearance of your dessert, but they’re preventable. Start by ensuring your ingredients are at room temperature. Cold cream cheese or eggs can create air pockets, leading to cracks during baking.
Another key step is to beat cream cheese at a low speed. Overmixing introduces air, which expands in the oven and causes cracks. Use a paddle attachment for a smoother texture.
Here’s a quick checklist to prevent cracks:
– Use room temperature ingredients.
– Avoid overmixing the batter.
– Bake in a water bath for even heat distribution.
– Cool gradually to prevent thermal shock.
– Avoid opening the oven door during baking.
Room Temperature Ingredients
Using room temperature ingredients is crucial for a smooth batter. Cold cream cheese or eggs can create lumps, making it harder to achieve a velvety texture. Plan ahead and let your ingredients sit on the counter for at least 30 minutes before mixing.
Here’s a timeline for ingredient tempering:
– Cream cheese: 30 minutes.
– Eggs: 30 minutes.
– Sour cream: 15 minutes.
– Butter: 10 minutes.
Gradual cooling is another essential step. After baking, let your dessert cool on the counter for 45 minutes before transferring it to the refrigerator. This prevents sudden temperature changes that can cause cracks.
| Step | Details |
|---|---|
| Ingredient Tempering | 30 minutes for cream cheese and eggs |
| Baking | Use a water bath for even heat |
| Cooling | 45 minutes on the counter before refrigeration |
By following these tips, you’ll create a dessert that’s not only delicious but also visually stunning. Remember, patience and attention to detail are your best tools for success.
Alternative Crust Options
Exploring different crust options can elevate your dessert to a whole new level. While a classic graham cracker crust is always a winner, experimenting with alternatives like Biscoff or Oreo can add exciting flavors and textures.
For a Biscoff crust, replace graham cracker crumbs with crushed Biscoff cookies. Use 1 ½ cups of crumbs and mix with ⅓ cup of melted butter. The caramelized flavor pairs beautifully with creamy fillings. When using cookie-based crusts, always spray your pan with nonstick spray to prevent sticking.
Here’s a quick comparison of crust varieties:
– Graham cracker: Sweet, crumbly, and versatile.
– Oreo: Rich, chocolatey, and indulgent.
– Biscoff: Caramelized, spiced, and unique.
– Gluten-free: Use almond flour or gluten-free cookies with binding agents like xanthan gum.
For gluten-free options, almond flour works well. Combine 1 ½ cups of almond flour with ¼ cup of melted butter and a touch of sugar. Press the mixture firmly into the pan for a sturdy base.
Flavor pairings are key to a harmonious dessert. A chocolate crust complements tangy fillings, while a nutty crust pairs well with caramel or fruit toppings. Pre-baking adjustments are also important. For denser crusts, bake at 350°F for 10 minutes to set the base.
By exploring these alternatives, you can create a dessert that’s not only delicious but also uniquely yours. Whether you stick with classic graham crackers or venture into new flavors, the crust is your chance to make a statement.
Conclusion
Mastering the art of baking a creamy, crack-free dessert is easier than you think. From preparing room-temperature ingredients to using a water bath, each step ensures a smooth, velvety texture. Cooling gradually and chilling overnight are key to a flawless finish.
Feel free to customize your creation with unique flavors. Swap the graham crust for Biscoff or Oreo, or experiment with toppings like fresh berries or caramel sauce. This recipe is versatile, making it perfect for any occasion.
Planning ahead? This dessert can be made up to two days in advance and even frozen for later. It’s a stress-free option for gatherings or special events.
Share your masterpiece on social media using #PerfectCheesecake and tag us for a chance to be featured. If you have questions, reach out to our baking experts for troubleshooting tips. Happy baking!


1 Comment
Very good