


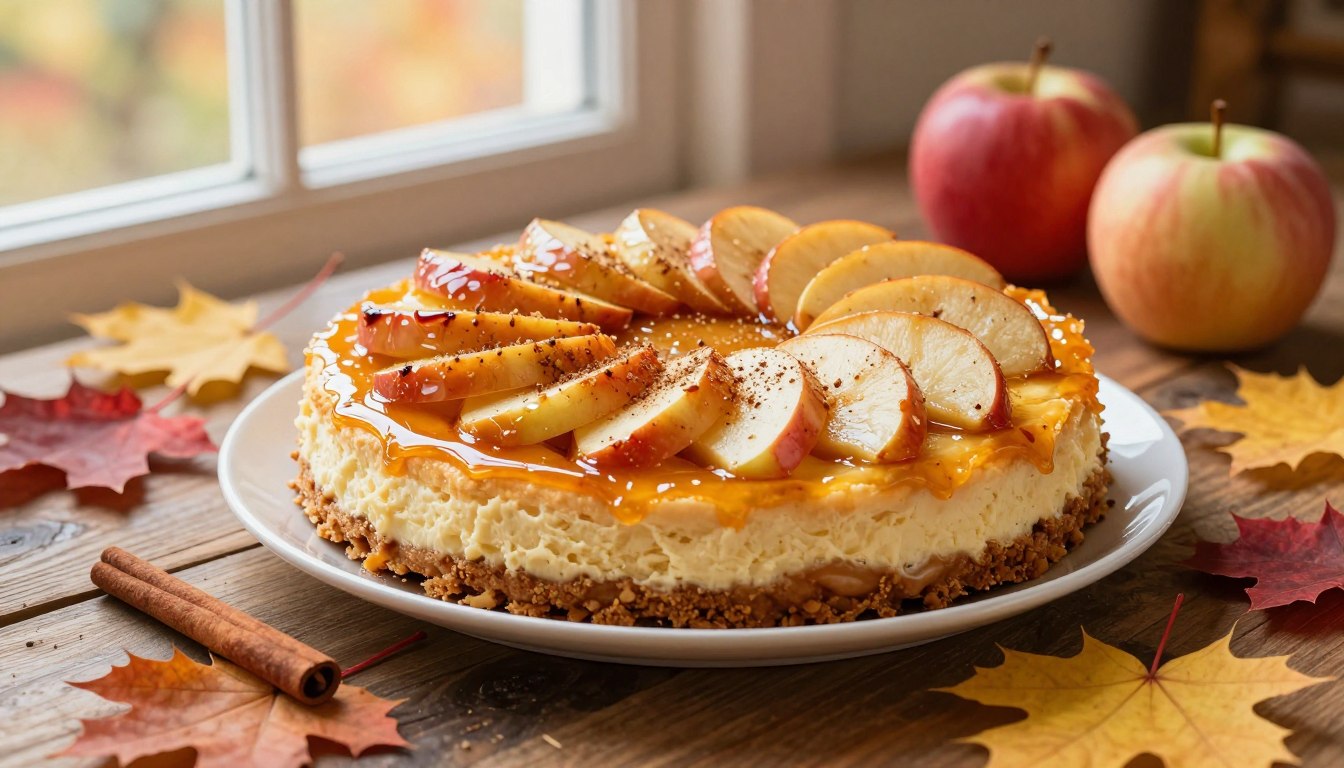
Few things match the comfort of spices filling your home on a crisp October afternoon. As chilly weather arrives, you may crave desserts that feel like a warm hug after a long day.
Learn to make a reliable autumn apple cheesecake from start to finish with this foolproof guide. This layered treat has a crisp graham cracker crust, smooth cream cheese filling, and tender fruit. The fruit cooks with cinnamon, nutmeg, brown sugar, butter, and lemon juice.
Careful preparation, gentle mixing, gradual baking, and thorough chilling help create a velvety texture and clean slices. Serve this autumn apple cheesecake as a Thanksgiving centerpiece, weekend baking project, or harvest gathering dessert. Your new favorite dessert awaits.
Table of Contents
What Makes Autumn Apple Cheesecake a Perfect Fall Dessert
Fall baking warms the kitchen, especially when you master classic apple dessert recipes. This cheesecake blends rustic harvest flavors with an elegant look. It offers a polished yet easy choice for your autumn table.
Key Features of a Seasonal Cheesecake
A fine seasonal dessert should capture the harvest. This recipe pairs cozy spiced fruit with the smooth richness of classic cheesecake. It creates a striking centerpiece for holiday dinners and weekend gatherings.
How the Creamy Filling, Spiced Apples, and Buttery Crust Work Together
Each component helps create the final flavor.
- The buttery crust provides a rich, crumbly crunch that anchors the dessert.
- The creamy filling adds a tangy, velvety richness that balances the sweetness.
- The spiced apple topping brings tender texture and familiar autumn warmth.
Together, these layers create a pleasing mix of flavors and textures in every bite.
What to Expect from This Homemade Apple Cheesecake
You need no complex pastry skills for professional results. When you remove the pan from the oven, expect a slight jiggle in the center. Once chilled, the cheesecake firms into clear, beautiful layers.
Let the dessert cool and set fully. Rushing this step can spoil its final texture. Patience gives you clean, beautiful slices.
Ingredients and Equipment You Will Need
Success with any seasonal cheesecake starts by organizing your ingredients and equipment ahead of time. Bringing all your refrigerated components to room temperature ensures a smooth, lump-free batter. Always measure your components accurately before turning on your oven to keep baking stress-free and organized.
Ingredients for the Buttery Crust
Graham Cracker Crumbs, Butter, Sugar, and Salt
Finely ground graham cracker crumbs create a stable base for your dessert. Melted butter binds the crumbs, while a touch of sugar adds balanced sweetness. A pinch of salt enhances the rich flavor profile.
Ingredients for the Creamy Cheesecake Filling
Cream Cheese, Sugar, Eggs, Sour Cream, Vanilla, and Spices
Full-fat block cream cheese is the best choice for a rich, firm filling. Eggs provide structure, sour cream adds moisture, and pure vanilla extract rounds out the taste. Warm spices bring the ultimate autumn flavor.
Ingredients for the Spiced Apple Topping
Apples, Brown Sugar, Cinnamon, Nutmeg, Butter, and Lemon Juice
Choose firm baking apples that hold their shape during cooking. Toss them with brown sugar, fresh lemon juice, butter, and measured spices for a glossy, tender fruit topping.
Recommended Baking Equipment
Springform Pan, Mixing Bowls, Electric Mixer, Saucepan, and Roasting Pan
A sturdy 9-inch springform pan allows clean release and an attractive presentation. Keep mixing bowls, an electric mixer, a saucepan, and a roasting pan ready for your water bath setup.
Step 1: Choose and Prepare the Apples
Fruit preparation is one of the most useful easy fall baking ideas you can try today. Handle fresh produce carefully before mixing batter or pressing your crust. This step helps your dessert keep a pleasing balance of texture and flavor.
Select Apples That Hold Their Shape
Best Apple Varieties for Baking
Choose fruit that will not turn into applesauce in the oven. Granny Smith, Honeycrisp, Braeburn, Pink Lady, and Jonagold are excellent choices. Their firm structure withstands heat.
How Sweetness and Tartness Affect the Finished Cheesecake
Tart fruits create a bold contrast with the rich, sugary filling. Sweeter options give each bite a softer, rounder flavor. Blending two varieties creates the ultimate taste experience.
Peel, Core, and Slice the Apples Evenly
Recommended Slice Thickness for a Tender but Firm Topping
Use a sharp knife to cut the fruit into even wedges. Make slices about a quarter-inch thick. This size cooks evenly and stays tender without becoming mushy.
How to Prevent Browning While You Prepare the Other Ingredients
Fresh fruit oxidizes quickly when exposed to air. Toss the cut slices with lemon juice right away. This simple trick keeps them vibrant and fresh.
Cook the Apples with Fall Spices
Combine the Apples, Butter, Brown Sugar, Cinnamon, Nutmeg, and Lemon Juice
Melt a tablespoon of butter in a large skillet over medium heat. Add the fruit, brown sugar, cinnamon, nutmeg, and citrus juice. Stir gently to coat every piece.
Cook Until the Apples Are Tender but Not Mushy
Sauté the mixture for about five to seven minutes. The fruit should soften slightly while keeping its shape. Watch the pan closely to prevent overcooking.
Cool and Drain the Apple Mixture
Why Cooled Apples Help Protect the Cheesecake Filling
Never add hot fruit directly to your dairy batter. Let the cooked topping cool completely at room temperature. Hot ingredients can melt the cream cheese and harm the dessert’s texture.
How to Prevent Excess Liquid from Making the Crust Soggy
Use a fine-mesh strainer to drain excess juices before assembly. This step protects your buttery crust from becoming soggy. These easy fall baking ideas help create a professional finish.
Step 2: Prepare and Bake the Buttery Crust
A memorable homemade apple cheesecake starts with a firm, flavorful crust. This sturdy base helps the dessert hold together and adds a satisfying crunch.
Make the Graham Cracker Crumb Mixture
Measure the Crumbs Accurately for a Stable Base
Measure graham cracker crumbs consistently with dry measuring cups. Do not estimate from whole crackers, because uneven amounts can make the crust loose or too dense.
Mix in Melted Butter, Sugar, and Salt Until Evenly Moistened
Combine the measured crumbs with melted butter, granulated sugar, and a pinch of salt. Stir until the mixture resembles evenly damp sand.
Press the Crust into the Springform Pan
Create an Even Bottom Layer with a Firm, Level Surface
Line your springform pan with parchment paper for easy removal. Add the crumbs, then press them into a level bottom layer with the flat bottom of a measuring cup or glass.
Press the Mixture Slightly Up the Sides for Easier Serving
Press a small amount of the crumb mixture slightly up the pan’s sides. This adds support and makes later slicing easier.
Prebake and Cool the Crust
Bake Until Lightly Set and Fragrant
Place the pan in the preheated oven for a short prebake. Bake the base until it smells toasty and looks lightly set.
Cool the Crust Before Adding the Filling
Remove the pan from the oven and let the base cool completely. This pause keeps the homemade apple cheesecake filling from warming too soon.
Avoid Common Crust Problems
Preventing a Crumbly Crust with Enough Butter and Proper Compression
Press firmly, but do not press too hard, or the base may become rock hard. Use the correct butter ratio to bind every crumb.
Preventing Overbrowning by Watching the Short Prebake
Watch the oven timer closely during baking. The crust should stay golden and fragrant instead of turning dark brown.
Step 3: Mix the Creamy Cheesecake Filling
Making delicious cozy autumn treats starts with a well-blended filling. Use careful technique instead of rushing through the mixing steps. Each step shapes your dessert’s final texture.
Bring the Ingredients to the Right Temperature
Use Room-Temperature Cream Cheese for a Smooth Batter
Start with softened dairy products to prevent lumps. Room-temperature cream cheese blends more evenly into the mixture. This habit reduces the need for prolonged mixing.
Let the Eggs and Sour Cream Warm Slightly Before Mixing
Cold dairy items can cause your batter to seize. Let the eggs and sour cream warm on the counter first. Warmed ingredients combine smoothly with the base.
Beat the Cream Cheese and Sugar
Mix on Medium Speed Until Smooth Without Incorporating Excess Air
Set your mixer to medium speed to break down the cream cheese. Beat until the mixture looks completely smooth. Avoid whipping too much air into the bowl.
Scrape the Bowl to Eliminate Dense or Lumpy Areas
Stop the mixer often to scrape the sides and bottom. This incorporates hidden pockets of dense cheese. You will create a more uniform consistency.
Add the Remaining Filling Ingredients in Order
Blend in Sour Cream, Vanilla, and Seasonal Spices
Add the sour cream, vanilla extract, and spices slowly. Cinnamon and nutmeg bring warmth to your dessert. Mix everything well before continuing.
Add the Eggs One at a Time and Mix Only Until Combined
Add the eggs one at a time. Mix each egg until you see no streaks. Overworking the batter can ruin its final texture.
Check the Batter Before Pouring
Look for a Thick, Smooth, and Evenly Spiced Texture
Inspect the batter before pouring it into the pan. The ideal mixture looks thick, glossy, and smooth. Each spoonful should contain evenly distributed spices.
Correct Small Lumps Without Overmixing the Batter
If you spot tiny lumps, scrape the bowl thoroughly. Mix briefly on low speed instead of increasing the power. This helps your cozy autumn treats keep their structure.
| Ingredient Phase | Optimal Temperature | Mixing Speed |
|---|---|---|
| Cream Cheese | Room Temperature | Medium |
| Eggs & Sour Cream | Slightly Warmed | Low to Medium |
| Spices & Vanilla | Ambient | Low |
Step 4: Assemble the Autumn Apple Cheesecake
Assembling your baked masterpiece turns simple ingredients into a stunning harvest dessert. Each layer helps create the perfect fall treat.
Pour the Filling Over the Cooled Crust
Spread the Batter into an Even Layer
Pour the velvety batter slowly into the center of the cooled crust. Use a small offset spatula to guide it toward the edges.
Tap the Pan Gently to Release Large Air Bubbles
Lift the springform pan a fraction of an inch, then tap it softly against a protected countertop. This pushes trapped air pockets upward without harming the crust.
Add the Spiced Apples
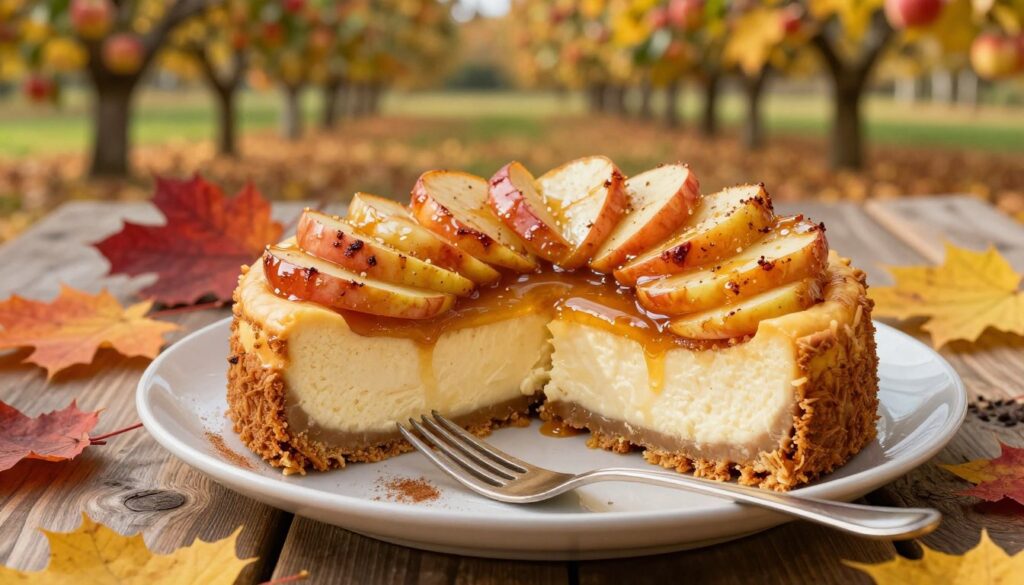
Arrange the Apples Across the Surface or Create a Decorative Pattern
Place the cooled apple slices over the batter in neat, overlapping circles. This thoughtful arrangement makes every slice of this stunning harvest dessert look bakery-worthy.
Keep the Apples Slightly Away from the Pan’s Edge When Possible
Leave a tiny border of bare batter around the pan’s edge. This helps the sides release smoothly after baking.
Prepare the Pan for a Moist Baking Environment
Wrap the Springform Pan Carefully if Using a Water Bath
Wrap the bottom and sides of the pan tightly with heavy-duty aluminum foil. Check for tiny tears to stop water from seeping inside.
Use a Roasting Pan to Reduce the Risk of Cracks and Dry Edges
Place the wrapped springform pan inside a larger roasting pan filled with hot water. This steady moisture keeps the cheesecake smooth and prevents surface cracks.
Step 5: Bake the Cheesecake Gently and Evenly
Turning your homemade mix into delicious apple desserts takes patience in the oven. Manage the heat carefully to protect your filling’s delicate structure.
Set the Oven Temperature and Baking Position
Use a Moderate Temperature for a Smooth, Creamy Texture
Keep your oven at the exact temperature recommended in your recipe. High heat makes the edges puff and crack before the center sets. Steady, moderate heat creates the smooth texture you want.
Place the Cheesecake on the Center Rack
Place your springform pan on the oven’s center rack. This position lets heat circulate freely around the pan. Even airflow keeps one side from cooking faster.
Bake Until the Center Is Nearly Set
Recognize the Slight Jiggle That Signals Doneness
Gently nudge the pan near the end of the baking time. The edges should look firm, while the center still jiggles slightly. Do not wait for the middle to become completely stiff.
Use an Instant-Read Thermometer Carefully if You Prefer a Temperature Check
Insert your probe into the filling, away from the crust and apples. Look for an internal temperature around 150 degrees Fahrenheit. Remove the pan immediately when it reaches this target.
Prevent Cracks, Sinking, and Overbaking
Avoid Opening the Oven Door Repeatedly
Resist peeking at your creation every few minutes. Sudden drafts of cool air can quickly deflate the batter. Keep the door firmly shut until the timer goes off.
Do Not Bake Until the Entire Center Looks Firm
Overbaking ruins the creamy texture you worked hard to create. Residual heat finishes cooking during the resting phase. Trust the jiggle test instead of waiting for a firm center.
Keep the Cheesecake Away from Sudden Temperature Changes
Drafts are the main enemy of a smooth surface. Protect your workspace from cold air vents during the cooling steps.
Cool the Cheesecake Gradually
Turn Off the Oven and Let the Cheesecake Rest with the Door Cracked
Turn off the heat and leave the dessert inside for one hour. Prop the oven door open a few inches with a wooden spoon. This slow temperature drop prevents sudden sinking.
Move It to a Cooling Rack Before Refrigerating
Transfer the pan to a wire rack so air reaches the bottom. Let it reach room temperature before moving it to the fridge.
| Baking Stage | Visual Cue | Internal Temp | Action Required |
|---|---|---|---|
| Early Bake | Shiny surface, completely liquid center | Under 130°F | Keep door closed |
| Peak Doneness | Set edges, gentle center jiggle | 145°F – 150°F | Turn off oven |
| Overbaked | Dull surface, completely firm, cracks forming | Over 160°F | Remove immediately |
Step 6: Chill, Finish, and Serve Your Homemade Apple Cheesecake
Now your baked cheesecake is ready. Proper chilling and careful slicing give it a polished look among traditional fall desserts.
Chill the Cheesecake Until Fully Set
Refrigerate for at Least Several Hours or Overnight
Chilling firms the filling and helps the flavors settle. Refrigerate the dessert for several hours or overnight for the best results.
Keep the Cheesecake Covered Once It Has Cooled
Cover the pan after the dessert cools completely. This protects the cheesecake from refrigerator odors and keeps its surface from drying.
Remove the Cheesecake from the Springform Pan
Loosen the Edge with a Thin Knife or Offset Spatula
Carefully run a thin knife or offset spatula around the inner ring. This releases stuck edges without harming the smooth surface.
Transfer It to a Serving Plate Without Damaging the Crust
Gently release the springform ring. Then use a wide spatula or cake lifter to move the cheesecake without cracking its crust.
Add Optional Fall-Inspired Finishes
Use Whipped Cream, Caramel Sauce, Toasted Pecans, or a Dusting of Cinnamon
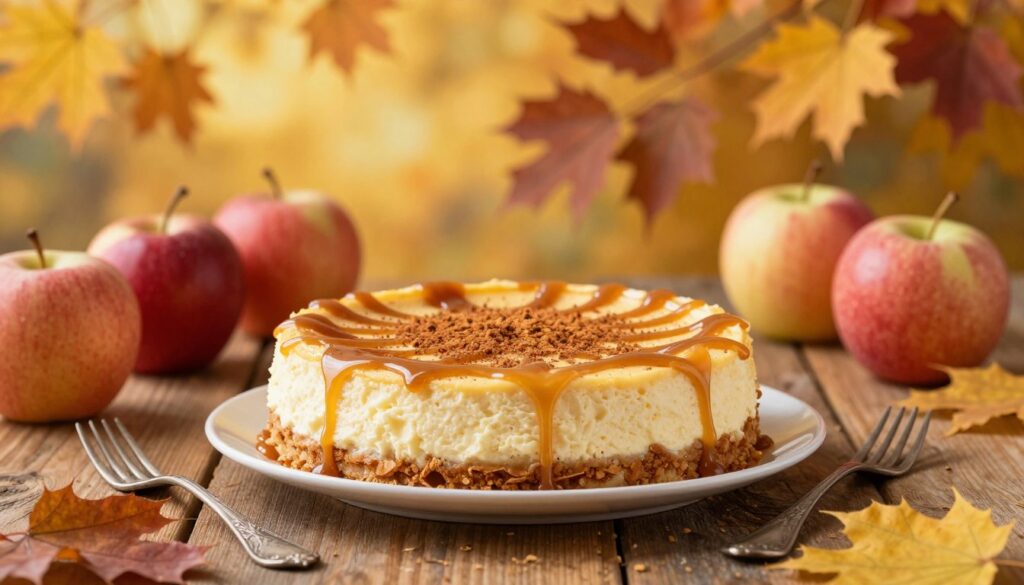
Add whipped cream, rich caramel sauce, toasted pecans, or cinnamon for seasonal flavor. These finishes make the cheesecake shine beside other traditional fall desserts.
Choose Toppings That Complement Rather Than Hide the Apple Layer
Place your chosen garnishes around the edges. Do not cover the beautiful apple pattern completely.
Slice and Serve Cleanly
Use a Warm, Wiped Knife for Neat Portions
Dip your knife in hot water, then wipe it dry. Make one smooth cut, repeating between slices for neat portions.
Serve Chilled or Slightly Tempered According to Your Preference
Serve the dessert cold from the fridge for a firm texture. Let it rest briefly at room temperature for a softer bite and richer apple layers.
Storage, Make-Ahead Planning, and Troubleshooting
Planning ahead and knowing how to fix small issues builds baking confidence. These practical steps help your autumn apple cheesecake turn out well for a party or sudden kitchen problem.
Store Leftover Cheesecake Safely
Refrigerate Slices in an Airtight Container
Place leftover slices in a sealed container to lock in moisture. This prevents the filling from absorbing unwanted refrigerator odors.
Follow a Short Refrigerator Storage Window for Best Texture and Flavor
Enjoy your homemade apple cheesecake within three to four days. This time preserves its texture and keeps the spiced topping from becoming too soft.
Make the Cheesecake Ahead for a Fall Gathering
Prepare the Cheesecake the Day Before Serving
Baking your dessert one day early saves time and lets the filling set completely. Chill it overnight for easier slicing.
Add Delicate Garnishes Shortly Before Presentation
Add whipped cream, caramel drizzles, or chopped nuts just before serving. This keeps the toppings fresh and attractive.
Fix Common Cheesecake Problems
What to Do if the Center Is Too Soft
If the center seems slightly underdone, check whether it chilled long enough. An overnight chill often firms it without extra baking.
How to Cover a Surface Crack with Toppings
A small surface crack is only cosmetic and easy to hide. Cover it with extra spiced apples or whipped cream.
How to Handle a Soggy Crust or Watery Apple Topping
A soggy crust often comes from under-drained fruit or excess moisture in the water bath. Drain your apple topping thoroughly before adding it to the chilled dessert.
Conclusion
A successful autumn apple cheesecake brings warmth and flavor to your kitchen. Choose firm fruit that holds its shape during cooking, then prepare the crust and chill the filling. These steps create a creamy texture, buttery base, and spiced apples in balance.
This seasonal cheesecake stands out among apple dessert recipes for a weekend baking project. It creates cozy autumn treats that impress guests at family dinners. Careful cooling prevents cracks and protects the smooth center of your homemade apple cheesecake.
Consider this harvest dessert for Thanksgiving celebrations and tables featuring traditional fall desserts. Keep the apple topping visible for an inviting presentation.
Easy fall baking ideas make delicious apple desserts accessible to bakers at any skill level. Enjoy your tasty creation all season long.
FAQ
Can I use any type of apple for your autumn apple cheesecake?
Choose firm baking apples, such as Granny Smith, Honeycrisp, Braeburn, Pink Lady, or Jonagold. These apples hold their shape when cooked and add a tart contrast to the sweet cream cheese filling. They suit seasonal cheesecake and other delicious apple desserts.
How can I prevent my homemade apple cheesecake from cracking?
To prevent cracks in your cozy autumn treats, bring cream cheese, eggs, and sour cream to room temperature. Avoid excess air, use the center rack and gentle heat, and cool the harvest dessert gradually. Leave it in the turned-off oven with the door slightly cracked.
Can I prepare this traditional fall dessert in advance?
Yes, you can prepare this traditional fall dessert in advance. This recipe suits holiday planning and easy fall baking ideas. Bake it the day before, chill it overnight in the refrigerator, then add delicate garnishes like caramel sauce or whipped cream shortly before serving.
What should I do if my apple topping releases too much liquid?
Cook your spiced apples until tender, then let them drain and cool completely before adding them to your cheesecake batter. This prevents excess liquid from making your buttery graham cracker crust soggy. It also guarantees a clean presentation for your apple dessert recipes.
