



Air-Fryer Crumbed Fish
Remember that craving for perfectly fried seafood? The kind with a satisfying crunch that gives way to tender, flaky goodness. You want that experience without the guilt, the mess, or the hours in the kitchen.
What if you could achieve Air-Fryer Crumbed Fish that golden, crispy coating using just a tablespoon of oil? This method delivers all the texture you love in a fraction of the time. Your family will ask for it again and again.
The process is wonderfully simple. You’ll set up a quick breading station with flour, egg, and seasoned breadcrumbs. Firm white fish fillets like cod or haddock work beautifully. They cook in about 20 minutes.
You get a healthier meal with significantly less oil than traditional frying. The high-heat circulation creates an incredibly crispy exterior. Serve it with lemon wedges and tartar sauce for classic flavor.
This guide will walk you through each step. You’ll learn pro tips for the crispiest results every time. Let’s make a delicious, family-friendly dinner that’s surprisingly easy to prepare.
Why You’ll Love This Air Fryer Fish Recipe
You’ll discover a healthier way to enjoy a classic comfort food favorite. This method is so much easier and less messy than traditional frying. The result is extra-crispy, flaky, and tender seafood with far less effort.
You get a perfectly textured meal every time. The interior stays moist and delicate. The golden crust provides a satisfying crunch without any greasiness.
Enjoy unparalleled convenience. From prep to plate, the entire process takes about 20 minutes. Your active cooking time is minimal.
This approach is health-conscious. It uses a tablespoon of oil instead of cups. You still achieve that deep-fried texture and flavor.
The recipe is incredibly versatile. It accommodates various dietary needs with simple swaps. Use gluten-free breadcrumbs or almond flour for a keto version.
It has major family-friendly appeal. Even picky eaters love these fillets. Serve them as whole pieces or cut into fun fingers for kids.
Cleanup is a breeze. The appliance contains all splatters. You only need to wash the basket and a few bowls.
Customize the flavor profile to your taste. Start with classic salt and black pepper. Add Old Bay, Cajun spice, or garlic powder for a twist.
You achieve consistent, foolproof results. The steps ensure your seafood is cooked through and crispy. It works every time you use your appliance.
Save money by making restaurant-quality fried fish at home. Ingredients like cod, haddock, breadcrumbs, and eggs are affordable and easy to find.
| Criteria | Air Fryer Method | Traditional Deep Frying |
|---|---|---|
| Oil Quantity | About 1 tablespoon (light spray) | 4-6 cups for submerging |
| Cooking Time | 10-12 minutes at 400°F | 15-20 minutes plus oil heating |
| Mess Level | Minimal; contained splatter | High; oil splashes, greasy stovetop |
| Final Texture | Crispy crust, flaky moist interior | Often greasy, can be soggy if not drained |
Skip the summer fish fry this year. Our favorite way uses the magic of hot air circulation. You get all the crunch with none of the guilt.
Making breaded fillets in this appliance simplifies everything. You set up a quick station with flour, egg, and seasoned breadcrumbs. Firm white fish like cod or haddock work beautifully.
Serve your creation with lemon wedges and tartar sauce. A side of coleslaw or fries completes the meal. It’s a dinner everyone will request again.
Gathering Your Ingredients & Equipment
Gathering high-quality ingredients and the correct tools sets the stage for a flawless result. This prep work is the secret to a crispy, golden crust and moist interior. Let’s ensure you have everything ready.
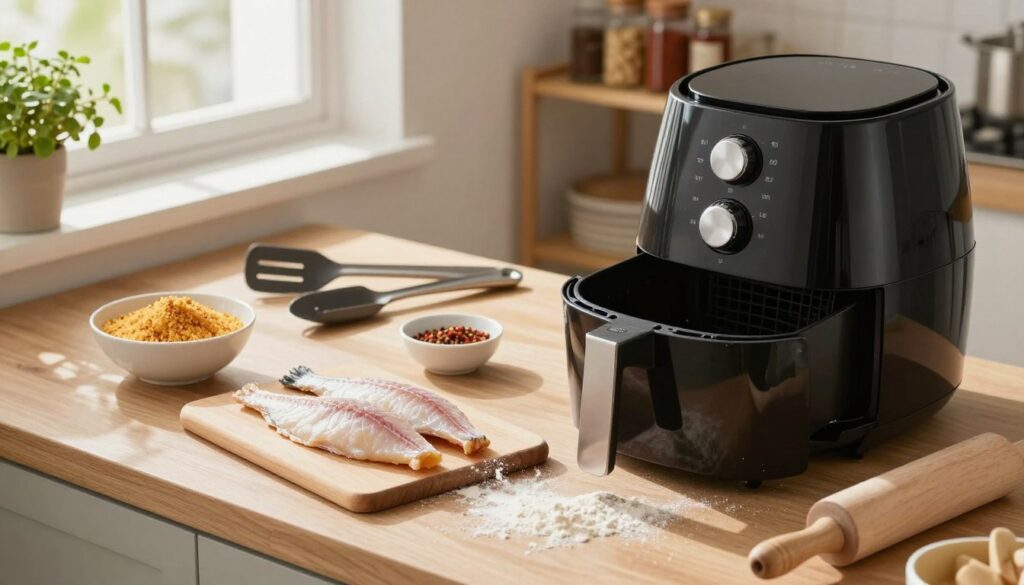
Organization saves you time and stress during the cooking process. You’ll move smoothly from prep to plate.
If you enjoy simple homemade comfort meals like this Air-Fryer Crumbed Fish, you might also love these easy recipes:
- Maple Salmon
- Lemon Rosemary Salmon
- Chef John’s Salmon
- Grilled Cod with Spinach and Tomatoes
- Baked Fish in Foil
Choosing the Best Fish for Frying
Select firm, mild-flavored white fish. Cod and haddock are excellent, affordable choices. Their texture holds up perfectly to the high-heat cooking.
Pat your fillets completely dry with paper towels. This step is non-negotiable for coating adhesion. Moisture is the enemy of a crisp breading.
Look for fresh or well-thawed portions of even thickness. This ensures they cook at the same rate. You can cut larger pieces into strips if needed.
The Coating Components: Flour, Egg, and Breadcrumbs
Your breading station needs three shallow dishes. The first holds all-purpose flour. It creates a dry base for the egg to stick to.
The second dish is for a beaten egg. It acts as the glue for the final layer. Use one or two large eggs, beaten well.
The third dish is for your breadcrumbs. Panko breadcrumbs are highly recommended for maximum crunch. You can use regular or gluten-free varieties.
Essential Seasonings and Flavor Boosters
Season every layer for deep flavor. Start with a simple blend of salt and black pepper. Add it directly to the flour and the breadcrumbs.
For a flavor boost, mix in other dried herbs and spices. Garlic powder and paprika add warmth. Old Bay seasoning gives a classic seafood profile.
Fresh lemon zest in the breadcrumbs is a pro move. Serve with lemon wedges and tartar sauce for the full experience.
Your Kitchen Tools Checklist
Having these items ready makes the process seamless:
- Your Air Fryer: A basket-style model is ideal for air circulation.
- Parchment Paper: Use perforated, air fryer-safe paper to prevent sticking and simplify cleanup.
- Cooking Oil Spray: A light mist of olive or avocado oil promotes even browning.
- Kitchen Tongs: Gently flip the fillets halfway through cooking.
- Instant-Read Thermometer: Check for a safe internal temperature of 145°F.
- Serving Plates & Sauces: Have lemon wedges and tartar sauce ready to serve immediately.
Make sure your air fryer basket is clean. If it’s not non-stick, a quick spray with oil is a good precaution. Now you’re ready to cook.
Step-by-Step: The Breading and Frying Process
With your ingredients assembled, it’s time to build the signature crunch through a simple, three-step breading process. This hands-on part is where your meal takes shape. Following these instructions ensures a crispy, golden exterior every time.
Step 1: Prep Your Breading Station
Organization is your best friend here. Set up three shallow dishes or plates in a row on your counter. This creates an efficient assembly line.
Your station needs just a few items:
- Dish 1: All-purpose flour, seasoned with salt and black pepper.
- Dish 2: Beaten eggs, which act as the essential glue.
- Dish 3: Your breadcrumbs. For maximum crispiness, use panko breadcrumbs. Season these well too.
Seasoning each layer builds deep flavor. Add garlic powder or Old Bay to the flour and crumbs.
Step 2: Dredge, Dip, and Coat the Fillets
Keep one hand for dry ingredients and the other for wet to minimize mess. Pat your cod or haddock fillets dry one last time.
First, dredge a fillet in the seasoned flour. Shake off any excess. This dry layer helps the egg adhere.
Next, dip the floured seafood into the beaten egg. Let the excess drip back into the bowl.
Finally, press the fillet firmly into the breadcrumbs. Coat it evenly on all sides. Gently pressing ensures the coating sticks during cooking.
Place the breaded piece on a clean plate or parchment paper. Repeat with the remaining fillets.
Step 3: Mastering the Air Frying Process
Now, let your appliance do the work. If your model recommends it, preheat to 400°F. Many can start cooking immediately.
Arrange the breaded fillets in a single layer in the fryer basket. Do not overcrowd them. Space allows hot air to circulate for even crisping.
Lightly spray the tops with oil. This promotes perfect browning. A quick mist from an oil sprayer is ideal.
Set the timer for 10 to 12 minutes. Cooking time depends on thickness. Thinner pieces may need only 8-10 minutes.
Halfway through, use tongs to gently flip each one. Give the other side a light spray of oil if it looks dry.
Monitor the color during the last few minutes. You want a deep golden-brown. The seafood is done when it flakes easily with a fork.
For thicker cod, you might need 12-14 minutes. Work in batches if necessary. Keep cooked portions warm in a 200°F oven on a wire rack.
Carefully remove your perfectly cooked dinner from the basket. Serve immediately with lemon wedges and tartar sauce for the ultimate experience.
How to Know When Your Fish Is Perfectly Cooked
The moment of truth comes when you need to determine if your creation is ready to serve. Getting the doneness just right ensures a crispy coating and a tender, flaky interior. Use these reliable methods to guarantee success every time.
First, look for visual cues. The breading should be a uniform, deep golden brown. There should be no pale or soggy spots on the surface.
For absolute precision, use an instant-read thermometer. Insert it into the thickest part of a fillet. The safe internal temperature is 145°F.
This temperature check is the most accurate way to know your white fish is cooked through. It removes all guesswork from your recipe.
The classic fork test is another trusted method. Gently twist a fork into the flesh of your cod or haddock. If it flakes apart easily and appears opaque, it is ready.
Observe the texture closely. Properly cooked seafood will be moist and separate into large, tender flakes. It should not feel rubbery or dry to the touch.
Always consider the thickness of your fillets. Thinner pieces will cook faster, often in 8-10 minutes. Adjust your cooking time to prevent dryness.
Listen for the sizzle. As the food nears doneness, the sound may lessen. Rely more on your visual and temperature checks for accuracy.
If the breading browns too quickly, tent the basket with foil. You can also reduce the temperature slightly. This issue is rare with proper air circulation.
Let your dinner rest for a minute after removing it from the air fryer basket. Residual heat will complete the cooking and set the juices.
Finally, trust your senses. The finished product should smell fragrant and appetizing. The coating should be crisp when you touch it lightly.
| Doneness Test | What to Look For | Why It Matters |
|---|---|---|
| Visual Check | Uniform golden-brown coating, no soggy areas | Confirms the breading is crispy and fully cooked |
| Temperature Test | Instant-read thermometer shows 145°F internally | Ensures food safety and perfect doneness |
| Flake Test | Flesh flakes easily with a fork and is opaque | Indicates the protein is tender and not undercooked |
| Resting Time | Allow to sit for 1 minute after cooking | Juices redistribute, preventing a dry result |
Following these steps takes the worry out of preparing fried fish. You will serve a delicious meal with confidence. Pair it with lemon wedges and tartar sauce for classic flavor.
Best Amazon Picks:
Serving Suggestions: The Perfect Pairings
Your masterpiece is ready, but the meal isn’t complete without thoughtful pairings that complement its texture and taste. The right sides and sauces turn your crispy creation into a memorable dining experience.
Start with the classic accompaniments. Serve with fresh lemon wedges for squeezing over the hot food. This adds a bright, acidic contrast to the rich, golden coating.
Prepare a simple tartar sauce for dipping. You can make a quick homemade version by mixing mayonnaise with chopped pickles, a squeeze of lemon juice, and fresh dill. A high-quality store-bought sauce works perfectly too.
Consider other delicious dipping sauces. Aioli, remoulade, or a spicy chipotle mayo offer fantastic flavor variety. For a kid-friendly option, keep it simple with ketchup.
Pair your main dish with traditional sides for a complete fish and chips experience. Crispy French fries or sweet potato fries are always a hit. You can even add hush puppies for extra fun.
Balance the plate with something fresh and crunchy. A light coleslaw or a simple green salad provides a wonderful vegetable element. It cuts through the richness beautifully.
For a heartier meal, add more substantial sides. Greek lemon potatoes, roasted seasonal vegetables, or a creamy potato salad are all satisfying choices. They make the dinner feel extra special.
Presentation matters for the full effect. Arrange your fried fish on a platter garnished with fresh parsley or dill sprigs. Add extra lemon slices for a visually appealing look.
Encourage everyone to customize their plate. Set out a variety of sauces and sides for an interactive meal. This approach suits different tastes and preferences.
Remember, timing is key. Your food is best served immediately after cooking to maintain its incredible crispy texture. Have all your sides and sauces ready to go when the air fryer basket beeps.
Pro Tips for Perfect Air Fryer Fish Every Time
Let’s unlock the tricks that guarantee a flawless, crispy outcome every single time. These expert strategies solve common frustrations and elevate your results.
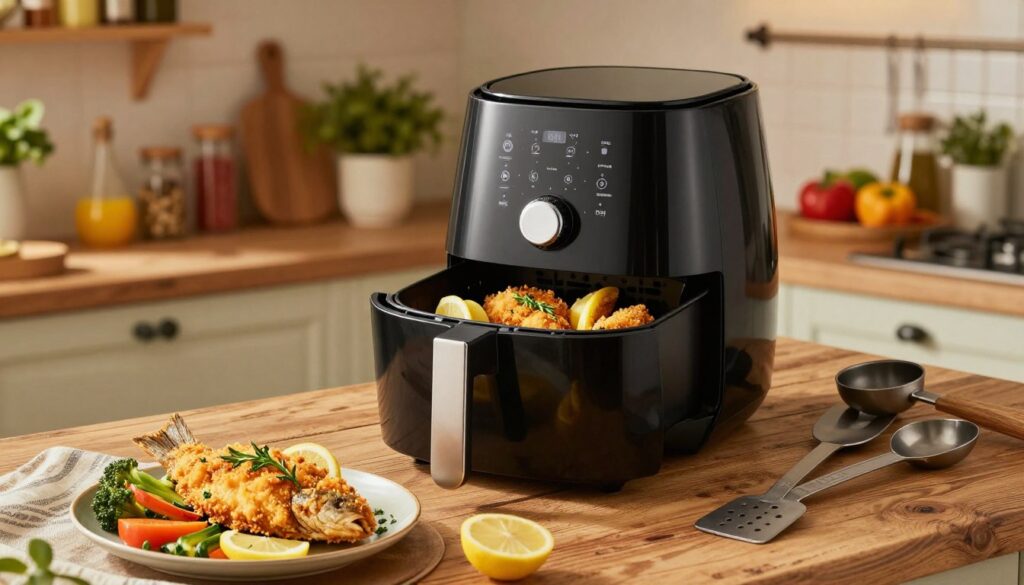
You will achieve a golden crust that stays put. Your interior will be perfectly moist. Follow these guidelines for consistent success.
Avoiding a Soggy or Falling-Off Breading
Moisture is the enemy of a crisp coating. Pat your cod or haddock fillets thoroughly dry with paper towels before you start. This step is non-negotiable for adhesion.
When applying your breadcrumbs, press them firmly onto the egg-washed surface. A gentle tap isn’t enough. Firm pressure ensures the coating bonds during cooking.
A light mist of oil spray just before cooking is crucial. It helps the exterior crisp up beautifully. Avoid soaking the breading, as too much oil can lead to sogginess.
For extra insurance, a quick preheat of your appliance can help. It starts the crisping process immediately. This prevents the coating from absorbing moisture.
Batch Cooking and Avoiding Overcrowding
Your appliance cooks best with solid air circulation. Always arrange breaded fillets in a single layer. Do not let them touch or overlap.
If your basket is small, cook in batches. This patience pays off with evenly cooked, crispy results every time. Overcrowding leads to steam and a soft texture.
Keep your first batch warm while the second cooks. Place them on a wire rack in a 200°F oven. This maintains the crunch without further cooking.
Remember, cooking time may vary slightly between batches. Check the second batch a minute or two earlier. Your appliance is already hot from the first round.
Easy Swaps for Dietary Needs
This cooking method is wonderfully adaptable. You can easily modify the recipe to fit gluten-free, keto, or other dietary plans. Simple ingredient swaps deliver great texture.
For a gluten-free coating, substitute all-purpose flour with almond flour or a certified gluten-free blend. Replace panko breadcrumbs with gluten-free panko or crushed cornflakes.
To create a low-carb or keto version, use almond flour and replace breadcrumbs entirely. Crushed pork rinds or grated Parmesan cheese make a fantastic crispy, carb-free crust.
If you need a dairy-free recipe, most panko is naturally dairy-free. Always check the label to make sure. For an egg-free binder, try buttermilk, aquafaba, or a commercial egg replacer.
You can explore other creative breading options. Crushed nuts like almonds or seeds such as sesame add great texture and nutrition. Adjust seasonings to manage sodium or allergen concerns.
Always test a small batch first when using new substitutes. This confirms cooking times and final texture. The beauty of this method is its flexibility without sacrificing flavor.
Storing and Reheating Your Leftovers
Knowing how to properly save and refresh your meal ensures no delicious bite goes to waste. With the right techniques, your crispy coated seafood tastes fantastic the next day.
Start by letting your cooked fillets cool completely at room temperature. This prevents steam from forming inside your storage container. Condensation is the main cause of a soggy coating.
Once cool, transfer the pieces to an airtight container. You can also wrap them tightly in aluminum foil or plastic wrap. Refrigerate your leftovers for up to three days.
For longer storage, freezing is an excellent option. Place the cooled fillets in a freezer-safe bag or container. They will keep for up to one month. Thaw them overnight in the refrigerator before reheating.
When you’re ready to enjoy them again, your air fryer is the best tool for the job. It re-crisps the breading beautifully. The microwave will steam the coating, leaving it soft and rubbery.
| Reheating Method | Resulting Texture | Recommended For |
|---|---|---|
| Air Fryer (350°F) | Crispy, golden exterior; hot, flaky interior | Best results, preserving the original quality |
| Microwave | Soggy, soft breading; often rubbery texture | Not recommended for this recipe |
To reheat, preheat your appliance to 350°F. Arrange the fillets in a single layer in the air fryer basket. Do not overcrowd them, just like during the initial cooking time.
Heat for 3 to 5 minutes. Check that the interior is hot and the coating is crisp. For food safety, use a thermometer to make sure the internal temperature reaches 165°F.
If the breading doesn’t return to perfect crispness, consider repurposing the leftovers. Flake the cooked cod or haddock into tacos, salads, or sandwiches. The flavor is still wonderful in these dishes.
Always inspect your refrigerated or frozen food before eating. Discard any portions that have an off smell or a slimy texture. Following these simple steps guarantees a safe and delicious second serving.
Related Recipes:
- Maple Salmon
- Lemon Rosemary Salmon
- Chef John’s Salmon
- Grilled Cod with Spinach and Tomatoes
- Baked Fish in Foil
Conclusion
Putting together a delicious, family-friendly meal has never been more straightforward. This method offers a quick, healthy alternative to deep-frying, delivering a crispy coating and tender interior every time.
Remember the simple process: pat your fillets dry, coat with flour, egg, and breadcrumbs, then cook in your appliance. Set it to 400°F for about 10-12 minutes.
The recipe is highly versatile. Use cod, haddock, or other white fish. Adjust seasonings like salt, pepper, or garlic powder. Try gluten-free breadcrumbs or panko for dietary needs.
Even novice cooks can achieve excellent results. Just make sure not to overcrowd the basket. This ensures proper air circulation for maximum crispiness.
Serve your creation immediately with lemon wedges and tartar sauce for the best flavor experience. We hope this becomes a regular in your meal rotation.
Share your results or questions in the comments. Explore other recipes, like salmon in your appliance, to expand your culinary skills. Thank you for reading!
FAQ
How long do I cook this in the appliance?
For most white fillets like cod or haddock, cook for 10-12 minutes at 400°F. Always check for doneness a minute or two early, as thickness varies. The coating should be golden brown and the flesh should flake easily.
Do I need to flip the fillets halfway through?
Yes, flipping is recommended. Gently turn your pieces over about halfway through the cooking time. This ensures even browning and crispiness on all sides for the best texture.
Can I use frozen fillets for this recipe?
Absolutely. For best results, thaw them completely in the refrigerator first and pat them very dry with paper towels. Starting with a dry surface is crucial for the breading to stick properly and get crispy.
Is it necessary to use oil?
A light spray of cooking oil is key. It helps the exterior become beautifully golden and crisp. Use an avocado or olive oil spray for the best results without making the dish greasy.
My breading sometimes falls off. How can I prevent this?
The secret is in the prep station order: flour first, then beaten egg, then crumbs. Press the crumbs firmly onto the fillet. Also, let the coated pieces rest for 5 minutes before cooking to help the layers set.
What’s the best sauce to serve with this dish?
Classic tartar sauce is a favorite pairing. For a zestier option, try a squeeze of fresh lemon or a quick dill yogurt sauce. A simple remoulade also adds fantastic flavor.
Can I use panko instead of regular breadcrumbs?
A> Yes, panko breadcrumbs are an excellent choice. They create an extra-crunchy, flakier coating that holds up very well in the hot air circulation of the fryer.
